Monday, October 31, 2016

Paper Temptress Note Cards

Hello, fellow crafty peeps! Today I want to share with you my project using a YouTube Tutorial from PaperCrafter45. Here is the link. It's really very simple. It does call for using the Envelop Punch Board from We R Memory Keepers, however. 
For the base of the card, I used Ivory Feltweave. The spool I used the Emerald Mica/Metallic, and the Copic Blending Papers for the inside of the card and envelopes. I do recommend using lighter weight paper, however, for the envelopes. But I didn't have quite enough of the other to use, and white for these cards was a better color.


This is an absolutely fun set of note cards to make! And I love the Emerald paper I used for them!
Blessings, Jeanie Ellis - Scrapbookingmamaw

Friday, October 28, 2016

Cuddly Cute Designs DT Project

Hello, everyone! And Happy Friday to you! I hope you've got your craft on today! I want to share with you my project from Cuddly Cute Designs, the Ginger Tags. They are adorable! I only chose to make one of them from the group of 4 (yes...there are FOUR!). The reason for it, is because I wanted to do some extra special technique to it. I sure hope you like it! Here is the link to the shop and the tag: Cuddly Cute Designs.

Now on to my project share:
Isn't it just adorable? Be sure to go to the link to look at the rest of the group. This is a paper piecing, meaning I had printed it out on my printer and then cut it out using my Silhouette. I took the front side of my tag and did some distressing to the pieces before adhering them together. After I did that, I placed everything onto the tag and got out my Versamark. I pressed the piece into the Versamark, then sprinkled my Ultra Thick Clear Embossing Powder all over it, heated it, let it cool, and repeated the process 2 more times. 

I then got out a 2nd red section of the tag so I could use it on the back of the tag. I did the same embossing powder process with it as I did the front. Before gluing the 2 pieces together, I took a piece of lace and glued it around the circle edge of the tag. Then proceeded to glue the 2 pieces together. This gave the tag more of an ornament feel to it and more stability. I was very pleased with the results, and hope you like it!

Come on over to the CCD Facebook page and let us see what you come up with! And you can find lots of inspiration there from all the DT's! 

Blessings, Jeanie Ellis - Scrapbookingmamaw

Tuesday, October 25, 2016

Crafty Gals Corner - #95

Hello, everyone! It's time for another challenge over at Crafty Gals Corner blog! This week, #95, is ANYTHING GOES! Here are our sponsors for this week:

Prize ~$10 Gift Certificate


Prize ~ 7 digital images

Prize ~ 3 digital images

For my project this week, I chose the Flapper Twirl Girl from Lemon Shortbread. I love doing tags, so I decided she would be perfect as a Christmas tag. So I colored her with my Prismacolors in Red and Black. I used stickles to glitter up her necklace, earrings, and belt.

I started my tag by cutting a piece of paper that is used in paper packages. It's not really chipboard, maybe more like a lightweight piece of cardboard. I then layer it in 2 sheets of cardstock, embossed it with a clock folder, used a burlap stencil with texture paste, and very fine glitter on top of the texture paste. Once that was dry, I glued my image down. I placed a red poinsettia I had made last year on the top of my tag. Under that, I adhered a sentiment tag. Using my Silhouette, I cut out an impatiens file. Rather than making it into an impatiens, I decided I'd make 3 rose from small to large.

At the bottom of the tag I placed a piece of lace on with hot glue and a double row of pearl strands. On top of that I glued 3 silver glitter snowflakes. 

I wanted her to look like she was going to a Christmas part. I hope I succeeded in that! Please join us in our challenge for this week. Don't think your project isn't good enough! Because we know it is!

I've entered this tag at the following challenges:
Lemon Shortbread - Anything Goes
Crafty Sentiments Designs - Anything Goes
Try it on Tuesday - Anything, using embellishments you made (I made the large poinsettia and the flowers)


Blessings, Jeanie Ellis - Scrapbookingmamaw


Outlawz Color Challenge 10/25/16

Hello, crafty peeps! Today starts a new Color Challenge over at the Outlawz!! This time around, I got to pick what choices we have for the challenge. :-D  First, here's the challenge board inspiration:
Here's what you need to do: Choose any 3 colors. Twist: Must use a Pumpkin Die Cut (punches count), or a Pumpkin Digital image. Now here's my card:
I chose the colors in the board because of the season. I used the white, black, and orange. Now, I realize I didn't follow the "Tic Tac Toe" format, as I wanted the free reign of colors, as long as it was 3 from the board. 

I made my pumpkins from a circle punch of 2 different sizes. I took a piece of white and embossed it with a kind of vine folder. I also used my Big Shot to make the green vines to come out and around the pumpkin. I placed the greenery slightly under the pumpkins and mounted them onto the white piece. I then mounted that onto the black cardstock and then onto the orange base card. I used my Silhouette to trim out my sentiment and added 6 rhinestone embellishments, 3 on to opposite corners. Oh, I also used my Tim Holtz distress ink around the pumpkins and my sentiment pieces. For the pumpkin stems, I just hand cut them out of green paper.

Please come join us over at the Outlawz Color Challenge! We LOVE seeing your projects!!

Blessings, Jeanie Ellis - Scrapbookingmamaw


Friday, October 21, 2016

Cuddly Cute Designs Project

So, here I am today with another creation from the team of Cuddly Cute Designs! I sure hope you've visited them since the last time I posted. They are super cute!! For today's project, I used the Gingerbread House Collection from the Christmas collection. From it, I chose to use the Gingerbread Man. Here is my project....a gift bag or it can be used as a treat bag. My daughter is so into Gingerbread Men that I couldn't resist!!
I used my Prismacolors to color in this little cutie. And to make the bag, I followed a tutorial by Persephone's Papercraft. While I did this bag pretty simply, I thought it turned out very cute. I didn't want too many embellishments on this one. 

I hope you come visit us on our Facebook Page too....lots of ideas there for these digitals!

Blessings, Jeanie Ellis - Scrapbookingmamaw


Saturday, October 15, 2016

NEWS FLASH!! TTCRD Blog Hop Coming!!!


Cuddly Cute Designs

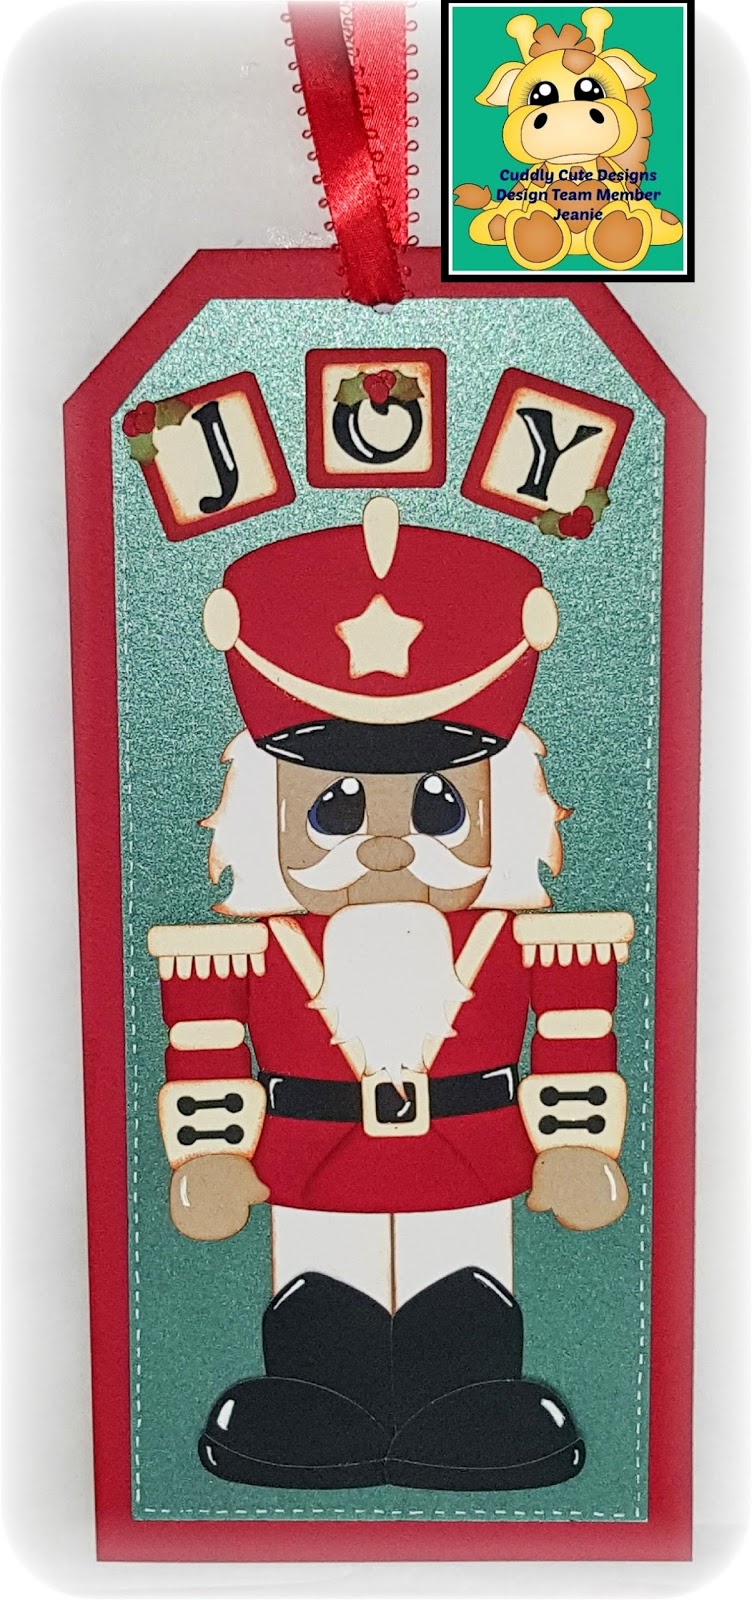
Hello, fellow crafters! Today I want to share with you a project using the Nutcracker by Cuddly Cute Designs. He was my very first paper piecing I've ever done! Once my friend, Kimberly, helped me how to go about it, I was on a roll! And I had so much fun doing the paper piecing! I never realized how much fun it is to paper piece! So before I go on, here he is:
Isn't he cute! What I like about the paper piecing is the fact that he's already colored. I just distressed him up some and put in the "highlights" myself. I used all paper from Paper Temptress: Red Pepper Classic Linen, Emerald Mica/Metallic (isn't it beautiful??), Eclipse Black and some scraps of white and beige I had in my stash. After I put him together and adhered him to the emerald and red pepper, I "stitched" along the edge of the emerald. Tied a ribbon at the top, and he was done! Paper piecing....so fun and so easy!

If you've never tried it before, I encourage you to go over to CCD and give it a shot! They're are super fun and oh, so cute!

Blessings, Jeanie Ellis - Scrapbookingmamaw