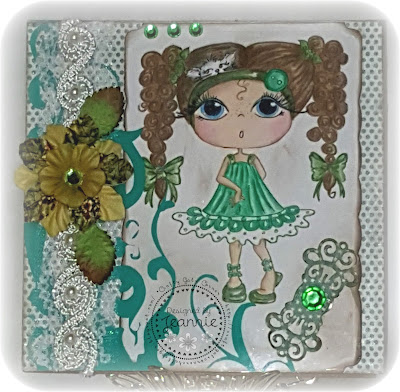
Wednesday, September 28, 2016

Crafty Gals Corner Challenge #91

Hi, Crafters! Today starts a new week with a new challenge of Anything Goes! And this week we have 2 sponsors!

Our sponsors this week are:

Rick St. Dennis

Prize: 2 Digital Images


"Rick St. Dennis, MFA has been an artist, designer, stage designer and instructor for over 45 years. You can find his full Bio here. His digital stamp images can be found on Zibbet or Etsy . Inspiration projects from the Rick St. Dennis Elite
 Design Team can be found on the Sparkle and Glitter blog, or for the darker images on the Airless Chambers blog.

Rick also has a personal blog  and on Facebook there is the Rick St.dennis Digi fans and friends group, showcase your cards and other projects using RSD images there to be eligible to win prizes."


The Stamping Boutique
Prize: $12 Gift Certificate


"Thank you so much for having us as your sponsor at CRAFTY GALS CORNER CHALLENGE. We at TSB are very proud to offer original digital images and artwork to you. Thank you for giving us a few minutes of your valuable time to look over the store  Good luck in the challenge and we hope to see you over at our store.  Good luck to all in the challenge and we can't wait to see your creations.
Tracey Malnofski


Now onto my project! I chose to do Alice in Wonderland from the Stamping Boutique. Isn't she cute!


As always, I started off with the coloring of my digi. And, having a new Silhouette Portrait, I thought I'd try my hand at coloring her that way. Wow! Who knew the colors would work so great? I will say, however, that I won't always do it that way, as I miss working with my Prismacolors. But it will come in handy if I'm in a hurry for a project one day, I'm sure! 

I also colored and cut out the sentiment with the Silhouette. I then placed her onto some blue corrugated paper, which then I placed onto a pink cardstock for my foundation. I embellished her with laces from Cindy's Facebook page, Lighthouse stop n' shop.  I added flowers and also some butterflies I colored and made from Paper Temptress. Best vellum paper ever!

I hope you come join us over at Crafty Gals Challenges blog! Show us what you create! 
I've entered this card into the following challenges:
Color ThrowdownCTD#412
Simon Says - Anything Goes
Three Muses - Butterflies
Crafty Sentiments - Anything Goes 
Creates and Makes - A/G optional use a die (my butterflies)

Blessings, Jeanie Ellis - Scrapbookingmamaw

Tuesday, September 27, 2016

Scrapbooking with M.E. GDT project

Hey, my fellow crafty peeps! I was asked to be a Guest Designer over at the Scrapbooking with M.E. Boutique on their Facebook page, and of course I said Yes!! I got my kit in last Thursday, which was the Simple Stories Bloom and Grow. This kit was the September kit from the boutique. The October kit will be available very soon!

Instead of doing 1 project, I decided to go ahead and do 2. Here is my first project:
I did a scrapbooking layout page using a lot of die cuts and the 3 burlap flowers in the kit. The only thing that wasn't from the kit was the white cardstock I used for a fence. I found the perfect picture for this layout....my 2 youngest grandchildren taken a few years ago. Wow, how lucky was that! I mounted the photo onto the burlap sheet that was in the kit, then mounted that onto a sheet of the printed cardstock, and in turn onto a 12x12 sheet of the cardstock. I then embellished the page with some of the die cuts from the kit. Now on to my 2nd project:
3-D Wheelbarrow

Close-up
Now, this one was a bit tricky at first. I was thinking this would make a great Fall centerpiece, but I just wasn't sure how I was going to do it. A friend of mine suggested the wheelbarrow idea. So I used one from the Silhouette. The fence is also from Silhouette. I had a wooden piece that was just laying around waiting for me to do something with it (insert wink here). I decided to use that as a base and spread texture paste on the bottom of it, spray it with green mist, and layer it with "grass", pushing it down so it would dry together. I then hot glued some of that after it was dried, to further keep it in place. I then put a fence around it. Before I went any further, I decorated my wheelbarrow by putting some of the grass into it and hot gluing the flowers inside. The sentiment pieces didn't have a "stem" to them, so I hot glued stems onto each one, then hot glued that inside the wheelbarrow. 

I then proceeded to put die cuts in front of the wheelbarrow, using the same "stems" in order to hot glue them onto the base. I glued more die cuts onto the fence. It took about 2 days to do this, as I wanted to be sure the texture paste had dried properly.

I hope you stop by the Scrapbooking with M.E. boutique! Every month there is a new kit, but you might want to order quickly, as these go fast! 

Thanks for stopping by!
Blessings! Jeanie Ellis - Scrapbookingmamaw

Outlawz Color Challenge Sept 27th!

Hello again, everyone! Today starts a new week of the Color Challenge over at the Outlawz! And I want to share with you my project. But first, let me show you the inspiration for the project I did:

Isn't this a gorgeous photo inspiration?? I love it! I chose the lavender, gold, and green for my project. The prize for this month is a free online subscription to Through the Craft Room Door. I've had the honor and privilege of being published there this year! :-)  

The digital is from Faery Ink. Lahla Tiger Lily Fae. Isn't she cute? Amanda offered it as a one day giveaway and I was privileged enough to get her for my project. I started out with a burlap canvas, which I was going to keep as a focus, but then I got "inspired", shall we say, and colored it with blues in the background and when the color dried, I spread Liquitex Glass Beads over the canvas area. I then sprinkled in purple and diamond glass glitter from Reneabouquets. After I let that dry over night, I added my laces and appliques from Cindy's Lighthouse Stop n' Shop Facebook page, plus the butterfly applique done by Kimberly's shop.

I then added a lot of flowers and further embellishments, some of which are from Gone Artsy. Most of my items I get from these wonderful ladies. So, there you have it! I hope you like her. Thanks for stopping by!

Blessings, Jeanie Ellis - Scrapbookingmamaw

Wednesday, September 21, 2016

Crafty Gals Corner #90

A new challenge over at the Crafty Gals Corner has begun! 
This week the challenge is Critters!
Our sponsors this week are:

Prize: $10 Gift Certificate 
Prize: 3 Digital Images

Prize: 3 Digital Images/ 1 Digital Set
My goodness! This year is just flying by! We're already into September...and it's over halfway done! Before the rest of the year sneaks up on me, I want to share with you this week's DT project I did for Crafty Gals Corner

CAT - STAMPlorations Digital
As you can see, my critter for this challenge is a Cat...better known as a Kitty in my family. Lol. I do love cats, and I thought this one was perfect. And honestly, when I saw her, she was already black and white, so I thought I'd do a CAS black and white card, simply coloring in her eyes and a touch of pink in her ears. She's such an adorable digi! 

I went to work cutting out a black and white swirly frame for her (on my NEW Silhouette Portrait...yay!). I then cut a piece of white cardstock out and embossed it. I layered the frame and Miss Kitty on top of that. A piece of black cardstock was my foundation. I put a few pearls on the top right, some lace on the left, and a Thank You sentiment on the bottom right. And I was done!

I hope you enjoy my little card, and that you will join us for this week's challenge.
I've entered my CAS card in the following challenges:
Fresh Brewed Blog - Animals
Kraftin' Kimmie Stamps - Anything Goes
Deep Ocean Challenge - Anything Goes
STAMPlorations Blog - CAS
Sunny Day Crafting - Anything Goes

Blessings, Jeanie Ellis - Scrapbookingmamaw

Tuesday, September 20, 2016

Outlawz Color Challenge - September 20th

Hello, crafty peeps! We started a new C O L O R Challenge over at the Outlawz! I sure hope you join along with us! We have an awesome prize in store for our winners...a year's subscription for the online magazine Through the Craft Room Door (TTCRD) are sponsoring us this month!

Now let me show you inspiration for this week's challenge:


So what do you see in this picture? I see a lot of round objects and lots of colors. With that in mind, I went with lots of circles and of course a variety of colors. Here's my project:

See the center circle with the pearls around it? I used a circle stencil and colored it with Prima Water Soluble Oil Pastels. I rubbed each of the colors onto my glass mat, added water, and used a sponge to get into the circles there. After it dried, I cut it out with a circle template. I had some Creative Memories paper that had circles on it, so I made that as the base front for my card. I cut out 2 sentiments with my circle punch, added 3 pearls at the top and bottom, added a flower that had a circular look to it, and I added round pearls around the perimeter of the stenciled paper.

I enjoyed working with the oil pastels. Truly fun! I hope you can join us over at the Outlawz Color Challenge! 

Blessings, Jeanie Ellis - Scrapbookingmamaw

Wednesday, September 14, 2016

Vellum Butterfly Tutorial - Paper Temptress

Hi, crafty peeps! Today I want to share with you a tutorial using the Paper Temptress heavy duty vellum. Love that paper! I have linked the picture below to the tutorial....Please enjoy! Blessings, Jeanie Ellis - Scrapbookingmamaw

new-butterfly-2-watermark

Crafty Gals Corner #89 Freestyle Challenge!

Yes, it's time for another challenge over at the 
This week the challenge is Freestyle!
And we have 2 great sponsors this week  who are:


Prize: 3 digital images below


Prize: 3 Digital Images
I want to share with you my project. I used an image from My Besties. She's such a cutie! You'll need to look closely at her hair...there's a little something hidden there. ;-) So, here she is....

I used Kraft paper for the foundation of the card and covered the front with My Mind's Eye "Happy Day".  I was going to link the paper up, but couldn't find it. After I had colored her with my Prismacolors, I placed her in my Big Shots machine and cut a shape around her and placed her on the Happy Day paper. I off-centered her so I could leave space on the left side for embellishments. On top of that, I placed some overlay from Paper Temptress. I placed a small die cut from the same paper line on the bottom right and put a rhinestone sticker on top of it and above my image too. I had been gifted some pearl lace so I placed it on the left side, glued some flowers (3 layers) in the middle of that, and she was done. Oh, I did distress all the edges and in the white of the image, also. 

I hope you can join us this week over at Craft Gals! There's always a chance to win some great images from our sponsors!

Blessings, Jeanie Ellis - Scrapbookingmamaw
I have entered this card into the following challenges:
Chocolate Baroque Challenge - Color Inspiration
Creative Moments - Fall Colors
Inspiration Destination - Anything Goes #103
Digi Choosday - Ribbons/Lace 


Tuesday, September 13, 2016

Outlawz Color Challenge 9-13-16

We have a new Color Challenge over at the Outlawz Challenges! 
And our sponsor is Through the Craft Room Door!
Prize: One Year Subscription to Magazine


Now I want to show you my project. This little girl is such a cutie!!! She's the Awww, Thanks digital from Tiddly Inks. And even better? She was FREE. I plan on going back in to buy some more, though....they are so doggone cute!

I hope you can see the details on this card. I wanted to do something a little differently, so when I saw a tutorial for this (and for the life of me, I can't find the link!), I figured this was the way to go. However, I did use my own dimensions rather than the tutorial, as I needed a slightly bigger card.
After I colored her with the Prismacolors, I went scored down on the horizontal side of the card. Basically, what you need for the folds is to make it into thirds. I then took my tag punch and cut out the bottom of the screen. Makes it look more like a screen that way, doesn't it? :-D I took a Martha Steward punch and made a border for the top. I trimmed out each fold with ribbon and lace (be sure it's flat enough so you can fold your card for mailing), added my flower I made and a sentiment on the front, and the flower appliques from Cindy's Lighthouse stop n' shop and corner appliques from Kimberly of KPkre8tions. Be sure to go check them out! These girls have some awesome goodies for great prices! And I happen to know Kimberly is in the process of making some Thanksgiving and Christmas appliques that are to die for! They are super gorgeous! 
So there you have it! It really is a lot easier to do than what I thought it was going to be. I hope you enjoy it and come see us over at the Color Challenge. While you're there, show us what you've created! We'd love to see it!
Blessings, Jeanie Ellis - Scrapbookingmamaw


Monday, September 12, 2016

Make my Monday Challenge Winner

Yay! I'm so excited to be a winner over at Make my Monday challenges. Link here

Paper Temptress DT Project

Fold Over Box
Hello, crafters! Today I want to share with you a box I made using almost all Paper Temptress papers. I found this tutorial on the Splitcoasters website, but the YouTube video for it is here. So, instead of telling you the process for making this, it'd be more beneficial for you if you went with the video. However, an FYI here: the lady mistakenly said a wrong measurement in the video for the fold over part of the box. Instead of 2 - 6x3", they should be 2 - 6x9". When I had done the latter measurement, however, I found the box to be too small for the fold over, so mine ended up as 2 - 5x9" using the Heavenly White. I then layered that over with a sheet of Hambly Studio Overlay. The butterflies on top are from Reneabouquets while the white applique butterfly that's on the front of the box is from KPKre8tions.
I made the flowers on the top: the white one is from the Silver Luster line (I also lined the inside with the same paper). I sprayed the flowers with a pearl mist. A leaf die cut was used on top and on the side of the box and a rose ribbon.
Here is my final project:
september-12-project-3-watermarkseptember-12-project-2-watermarkseptember-12-project-watermarkd
I hope to see some of your projects on our Facebook page

Wednesday, September 7, 2016

Crafty Gals Corner Challenge #88

Hello, all you wonderful crafters! I hope your day is going well for you! Today I want to share with you the Crafty Gals Corner newest challenge....LET'S HEAR IT FOR THE GIRLS! And our sponsor for this week is:
Prize: $12 Gift Certificate
Did you see that?? A $12 Gift Certificate! This is great! I hope you can join us for a chance to win this awesome prize! Without further adieu, here is my project using Heart Girl from Sami Stamps. 
She was so fun to color....and it didn't take that long to do. She is just one of those digitals that is so very easy and fun to work with. I didn't use chipboard on her. Instead, I used chalk paper that had pink hearts on it, put heavy weight black card stock on the back of that, and used my white card stock to color her on. I had distressed the edges of the papers before gluing them down. I then put a lace about the middle of the chalk paper and layered the image onto that. I placed pink pearls around the image. I then die cut my flowers and leaves out (my sister bought me my very early birthday present and of course, I couldn't wait!), and layered them around the image. Flat-back pearls were added as centerpieces onto each flower. I glued a heart strand onto the bottom of the tag. I thought about adding lace at the bottom, but right now, I'm liking her as a pretty clean and simple tag. Oh, I did cut out a sentiment I had from chalk paper, and added black and gold ribbon at the top. 

I hope you enjoyed this project of mine! If you're not a subscriber, please do subscribe and follow me! And be sure to join in on the challenge at Crafty Gals Corner Challenges!

Blessings,
Jeanie Ellis - Scrapbookingmamaw

I've entered this into the following challenges:
Sami Stamps - Dots (the center of my flowers and the pearls are my "dots")
Cuttlebug Mania - Anything Goes with Die Cuts
Sparkles Monthly Challenges - Lots of Layers
A Bit More Time to Craft - Anything Goes
Kraftin' Kimmie Stamps - Anything Goes
The Crafty Addicts - Anything Goes


Tuesday, September 6, 2016

Outlawz Color Challenge Sept 6th

Today starts a NEW COLOR CHALLENGE! So I want to share with you my project. First, here is the inspiration photo I got it from:
Now, I didn't notice this at first, but a couple of the DT ladies in the group said they saw houses in this photo. So of course I had to look again, right? And guess what I saw....houses! With lots of books! So I went on a hunt to find some digitals that had books in them, and discovered a digital shop with lots of cute digis in there. This is the shop I found: Tiddly  Inks!  And here is my image: School Girl. Isn't she just adorable?? So then I thought...what about the house part? I decided I'd make a tag in the shape of a house, then use her as my focal point because of the books. Made sense to me. (*insert wink here*).

Here is my tag:
The foundation is chipboard, and I found some paper in my stash that had lots of wording on it, so I used it as my mounting base. Of course, I colored her first. I inked the edges with distress ink. Then I added corrugated paper as my roofing and chimney. I sprayed with some pearlized misting spray, added a textured sticker border on the bottom, lace, heart pearl strand, flowers, and then placed her onto the tag with foam tape. That enabled me to put the sentiment "Learn" onto the tag better.

Be sure to come by and join in on the challenges! And visit Tiddly Inks! 

Blessings, Jeanie Ellis - Scrapbookingmamaw
I've entered this tag into the following challenge(s):
Tuesday Throwdown - School Spirit
Lemon Shortbread - Always Anything Goes
Tiddly Inks - Let's Get Sketchy (I did my under layer horizontally rather than vertically)
Crafting from the Heart - Always Anything Goes
Craft Your Passion - Always Anything Goes
Make My Monday Challenge - Back to School


Saturday, September 3, 2016

Conie Fong August Challenge Project

Hello, crafters! Today I want to share with you a project I did using a Conie Fong image for her August challenge she held. I absolutely love her images! Here is the link to her Facebook page and there is a link for her shop, too. Conie Fong Art & Design Group.

Here is my completed project:
Sitting Pretty on a Mushroom

I know the picture isn't as good as I would like, but I think there are 2 reasons for that:
One: Because I took the picture at night, and Two: because I had a lot of bright colors, I should've adjusted it. Anyway, the challenge called for using her image with patterned papers. I used a lot of gloss and glitter on this card, so I'm sure that has a lot to do with it, too! :-D  

Be sure to check out her page. She has beautiful digitals! I'm so in love with them! 

Blessings, Jeanie Ellis - Scrapbookingmamaw