Tuesday, February 28, 2017

Outlawz Challenge - Feb 28th

Howdy, Crafty Partners! It's so nice of you to stop by! Today I want to share with you this week's Color Challenge over at The Outlawz. But first, here is our sponsor for this month: Bugaboo Stamps
Prize: 5 Digital Stamps - Yay!

Be sure to head on over there and check out Bugaboo! There are a lot of cute images there! Now let me show you the photo inspiration:

TWIST: WEDDING OR ANNIVERSARY CARD

I just love the inspirational photo! The colors were perfect for a wedding to me, so that's what I ended up making: A wedding card.

I started off by cutting out all my die cuts with my Silhouette, including the honeycomb doily in the center. I used a white card stock for the base of the card, printed out a color to match the inspirational photo a blue-gray color, and embossed it. I placed it on top of the base, added my sentiment in the middle, the wedding couple in the lower right corner, roses from Wild Orchard Craft, and pearls at the top left.

This card was a lot of fun to make. I really put my Silhouette to use today! I hope you head on over to the Outlawz and join in on the fun!

Blessings, Jeanie Ellis - Scrapbookingmamaw

Monday, February 27, 2017

Tsunami Rose Designs Mixed Media Canvas

Hello, crafters! Today I want to share with you another project using the Rose Notecards Printable Kit from Tsunami Rose Designs (TRD for short). This was a lot of fun for me, as I LOVE mixed media!

So let me share with you my project:


I used a white 8x10 canvas, covered it with Gesso, then started layering with my papers. The first layer is the Rose Notecards Journal Kit addons page 4, using Mod Podge to adhere. Then I took page 1 from the addons and tore the large flowers so I could place them on the top and bottom of the canvas. After that, I took stencil and used my white Ranger texture paste and spread it on different areas of the canvas and sprinkled Diamond Glass Glitter (Reneabouquets) on the paste. I used my heat gun to dry everything quickly. I took various laces and added them onto the canvas and mod podged all my elements onto the canvas. (Ephemera: set 12-page 3, set 14-pages 5, 11, and 15.)

Here's a little tip for you: When you are using digital papers or ephemera, etc., mod podge and dry it first before adhering to the surface. That way, the ink won't bleed onto your artwork. 

After placing all the digital elements (ephemera) onto the canvas, I took Glossy Accents and sprinkled Gold Microbeads into the glossy. I also got those from Reneabouquets. I used Stickles in her hair piece and on one of the perfume bottles and little purse. Once I got all those done, I added the pearl drops on the top and bottom of the canvas.

There is a process video on my YouTube channel that you can check out to get the more "in-depth" version of it! 

Thank you so much for stopping by! But before you go, please do me a favor and stop by TRD's links! 


Blessings! Jeanie Ellis - Scrapbookingmamaw

Friday, February 24, 2017

Corgi Reveal #3!

Hello, crafty peeps! Today I want to share with you the 3rd and final reveal for the new Corgi Stamp Set! This time around, I made a little doggie treat box. Here it is:

I used my Silhouette Portrait to cut out all the pieces for this box. It's perfect for that special little furry friend! And what's a gift box for "Fido" without treats and puppy pictures all over it, right? I also got the dog bone printed paper from the SIL store, too. 

The paw prints, little "bubbles", Corgi, Pug, and sentiment are all from the set. This may sound odd, but I think the paw print is my favorite! Lol! It's so tiny and cute!  This set will be released by JessicaLynnOriginals on February 25th. That's tomorrow! But if you pre-order the stamp set today, you get free shipping! Here is the link to do that:

http://jessicalynnoriginal.com/pre-order-jessicalynnoriginal-akc-dog-corgi-2017-with-pug-friend-clear-rubber-stamp-set-4x6

Be sure to tell them Jeanie sent you!

I'm so glad and thankful you stopped by today! And leave me a comment...I read every one of them! And please visit the other Designers! They have some wonderful and inspiring projects to share too!

Jessica (owner and creator) 
Lisa 
Jeanie - YOU ARE HERE

Blessings, Jeanie Ellis - Scrapbookingmamaw

Thursday, February 23, 2017

Corgi Stamp Reveal #2!

Okay, crafty peeps! Here is another reveal for the awesome Corgi Stamp Set! This is such a cute little set!  This is the 2nd of the 3 projects with the soon to be released Corgi stamp set. It will be released by JessicaLynnOriginals on February 25th. If you pre-order the stamp set today, you get free shipping! Here is the link to do that:

http://jessicalynnoriginal.com/pre-order-jessicalynnoriginal-akc-dog-corgi-2017-with-pug-friend-clear-rubber-stamp-set-4x6

Be sure to tell them Jeanie sent you!

Now onto my card for today.....this time it's a pop-up card, but no twist to it. Again...good ol' YouTube gave me this idea!
Front

Inside
As you can see, it's a pretty clean and simple card. See the star in his hat? That wasn't there in the dog's hat, but it does come with the set. So, I thought I'd just add it in! And it fit perfectly! I just love those paw prints, too! They're so tiny and cute! And a perfect fit for the index finger! I don't have a small acrylic block....where it went I don't know....but my finger did just fine. 

I cut out the candles with my Silhouette, and also the leaves on the sides. Dogs love the outdoors, and our dog continually picks up leaves and brings them in the house. So, hence the leaves. Lol. The printed paper is from Graphic 45.

Be sure to check out the other Designers projects! They are awesome and very inspirational! Here are their links:

Jessica (owner and creator) 
Lisa 
Jeanie - YOU ARE HERE

Blessings, Jeanie Ellis - Scrapbookingmamaw


Wednesday, February 22, 2017

JessicaLynnOriginal Sneak Peek Stamp Set!

A Great Big Hello to you from me and the JessicaLynnOriginal Design Team! We are happy to say that JessicaLynnOriginal is launching a new stamp set called Corgi! And the DT are all showing you what projects we have come up with so you can have a "sneak peek"! They are very varied and very awesome! That's what I love about this team...same set, but a whole lot of happening in a variety of ways! I will be featuring 3 projects with the soon to be released Corgi stamp set. It will be released by JessicaLynnOriginals on February 25th. If you pre-order the stamp set today, you get free shipping! Here is the link to do that:

http://jessicalynnoriginal.com/pre-order-jessicalynnoriginal-akc-dog-corgi-2017-with-pug-friend-clear-rubber-stamp-set-4x6/

Be sure to tell them I, Jeanie Ellis, sent you!

So now let me show you the 1st of my 3 projects. I decided this little guy needed more than "just a card", so I ended up making a Pop Up Twist Card. These are very popular right now and there are all kinds of YouTube tutorials in making one. Here it is:
Front with band

Front without band

Inside "twist"
I so love this cute set! You see all those little paw prints? I actually used my finger and put the stamp on my index finger rather than an acrylic block. Worked like a charm!

I  hope you enjoyed this! Be sure to stop by the blogs of the other Design Team Members! You'll get a lot of inspiration and ideas! Here are their links:

Jessica (owner and creator) 
Lisa 
Jeanie - YOU ARE HERE

Thank you so much for stopping by! 

Blessings - Jeanie Ellis, Scrapbookingmamaw

Tuesday, February 21, 2017

TTCRD Feb 21st Challenge

Hello, crafty friends! It's time once again for another challenge over at Through the Craft Room Door! And as always, it's ANYTHING GOES! This week, our sponsor is the awesome.....
Since 2010, Digistamps4Joy (or DS4J) www.digistamps4joy.co.za/eshop - a unique South African online digistamp store – has been providing you with fabulous digistamps that are cute, whimsical, artistic, sometimes serious, and often humorous. The store has verified PAYPAL facilities for our international clients, as well as PAYFAST and EFT for our South African customers.   You are welcome to enter our monthly card challenges on our Blog at http://digistamps4joysa.blogspot.com and of course “like” our Facebook page at http://www.facebook.com/DS4Joy where you will receive regular updates on our activities. PRIZE: $10 Voucher!

So for this challenge, I chose the beautiful Bedazzled Bride. She is a gorgeous image! And I was totally into doing something different and special for her! 
 BUT...For more details on how I created this card, be sure to check it out in the upcoming TTCRD MAGAZINE!  And come join in on the challenges! We LOVE looking at your creations!

Blessings, Jeanie Ellis - Scrapbookingmamaw

Outlawz Feb 21st Color Challenge!

WHAT DAY IS IT?? It's a new COLOR CHALLENGE day over at The Outlawz! Woot! And again, this month our wonderful sponsor is Bugaboo Stamps.
Prize: 5 Digital Stamps - Yay!

Now here is the photo inspiration, picked by fellow DT member, our very own Ursula. Great, huh! I decided to go for an anniversary card this time around.  

Again, for this project, I used my Silhouette Portrait to cut out my card. Every cut out you see here I cut using the machine. Then all I had to do was distress the edges, stamp my sentiment, adhere them to the card base, and add my embellishments. It turned out so much better than I thought it would, because I was unsure about the colors to pick from the photo inspiration.

I'm so glad you stopped by! And I hope you decide to join us in our this week's challenge! You just might be a winner! (In our eyes...everyone is a winner, though!)

Blessings, Jeanie Ellis - Scrapbookingmamaw

Wednesday, February 15, 2017

Crafty Gals Corner Challenge #110

Hello, fellow crafters! We have a new week of challenges that started today! And we have a great theme (LOVE the theme!)...."Favorite Things"! And you know what came to my mind? In order to get all my favorite things on there, I need to do a mixed media canvas! Yay! But first, here are our sponsors for this week:
Prize: 4 Digital Images (1 from each artist)

 Jennifer Nilsson Art  ♥︎  Mari Digis  ♥︎  Miss Daisy’s Collection ♥︎  We Are 3  

Join us at Miss Daisy Stamps Create & Share Facebook Group to meet the artists, 
share fun & inspiration, receive freebies and special deals. See you there!


Prize: 2 Digital Images

"Rick St,dennis MFA has been an artist, designer, stage designer and instructor for over 45 years, you can find his full Bio here. His digital stamp images can be found on Zibbet or Etsy . Inspiration projects from the Rick St.dennis Elite
 Design Team can be found on the Sparkle and Glitter blog, or for the darker images on the Airless Chambers blog.

Rick also has a personal blog  and on Facebook there is the Rick St.dennis Digi fans and friends group, showcase your cards and other projects using RSD images there to be eligible to win prizes."
Oddball Art Stamps
Prize: 3 Digital Images
Wow! What a great group of sponsors we have! Be sure to check out their links!

Now, onto my project. The image I chose for this project was the 1960 Coutoure Hat by Rick St. Dennis (found in his Zibbet store). I loved doing this image. So here it is:
When I started this project, I had somewhat of an idea as to what I wanted to do with her. But with Mixed Media...anything can happen! You can start one way and end up a whole new way. This time, however, for the most part, it ended up being what I intended it to be.

I started off by priming the canvas with Gesso. While that was drying, I cut and colored my image with the Prismacolors. I then set her aside and began putting layers on the canvas using tissue paper and a brown paper that had small slits in it, simply to give it some texture. I mod-podged those on. I dried that with my heat gun and then hot glued some butterflies on in the right side toward the bottom of the canvas. I got out my Gesso again and covered everything with it. After it was dried, I took red and black acrylic paints, watered them down, and splattered bits of paint all over the canvas. I took a rose trim, hot glued that around the edge of the canvas and started to add my embellishments. I made a "hat pin" for the hat and added a big "bling" to the bottom and to the right of Miss Couture, and lastly I added a beautiful black applique fan to the canvas. The applique was made by Kimberly of KPKre8tions

Thank you for stopping by! I hope you will join us in on the challenge this week!

Blessings, Jeanie Ellis - Scrapbookingmamaw

Tuesday, February 14, 2017

Wow! A Great Giveaway from Silhouette!

Here is the link. Maybe you or I will win one!

https://contest.io/c/jgzvnc47

New Outlawz Color Challenge - Feb 14th

Howdy, crafters! Well, guess what day it is? It's a New Color Challenge Day, that's what it is! And where? Over at The Outlawz, that's where! I hope you come join us! Before I go on, though, let me show you the photo inspiration for this week:
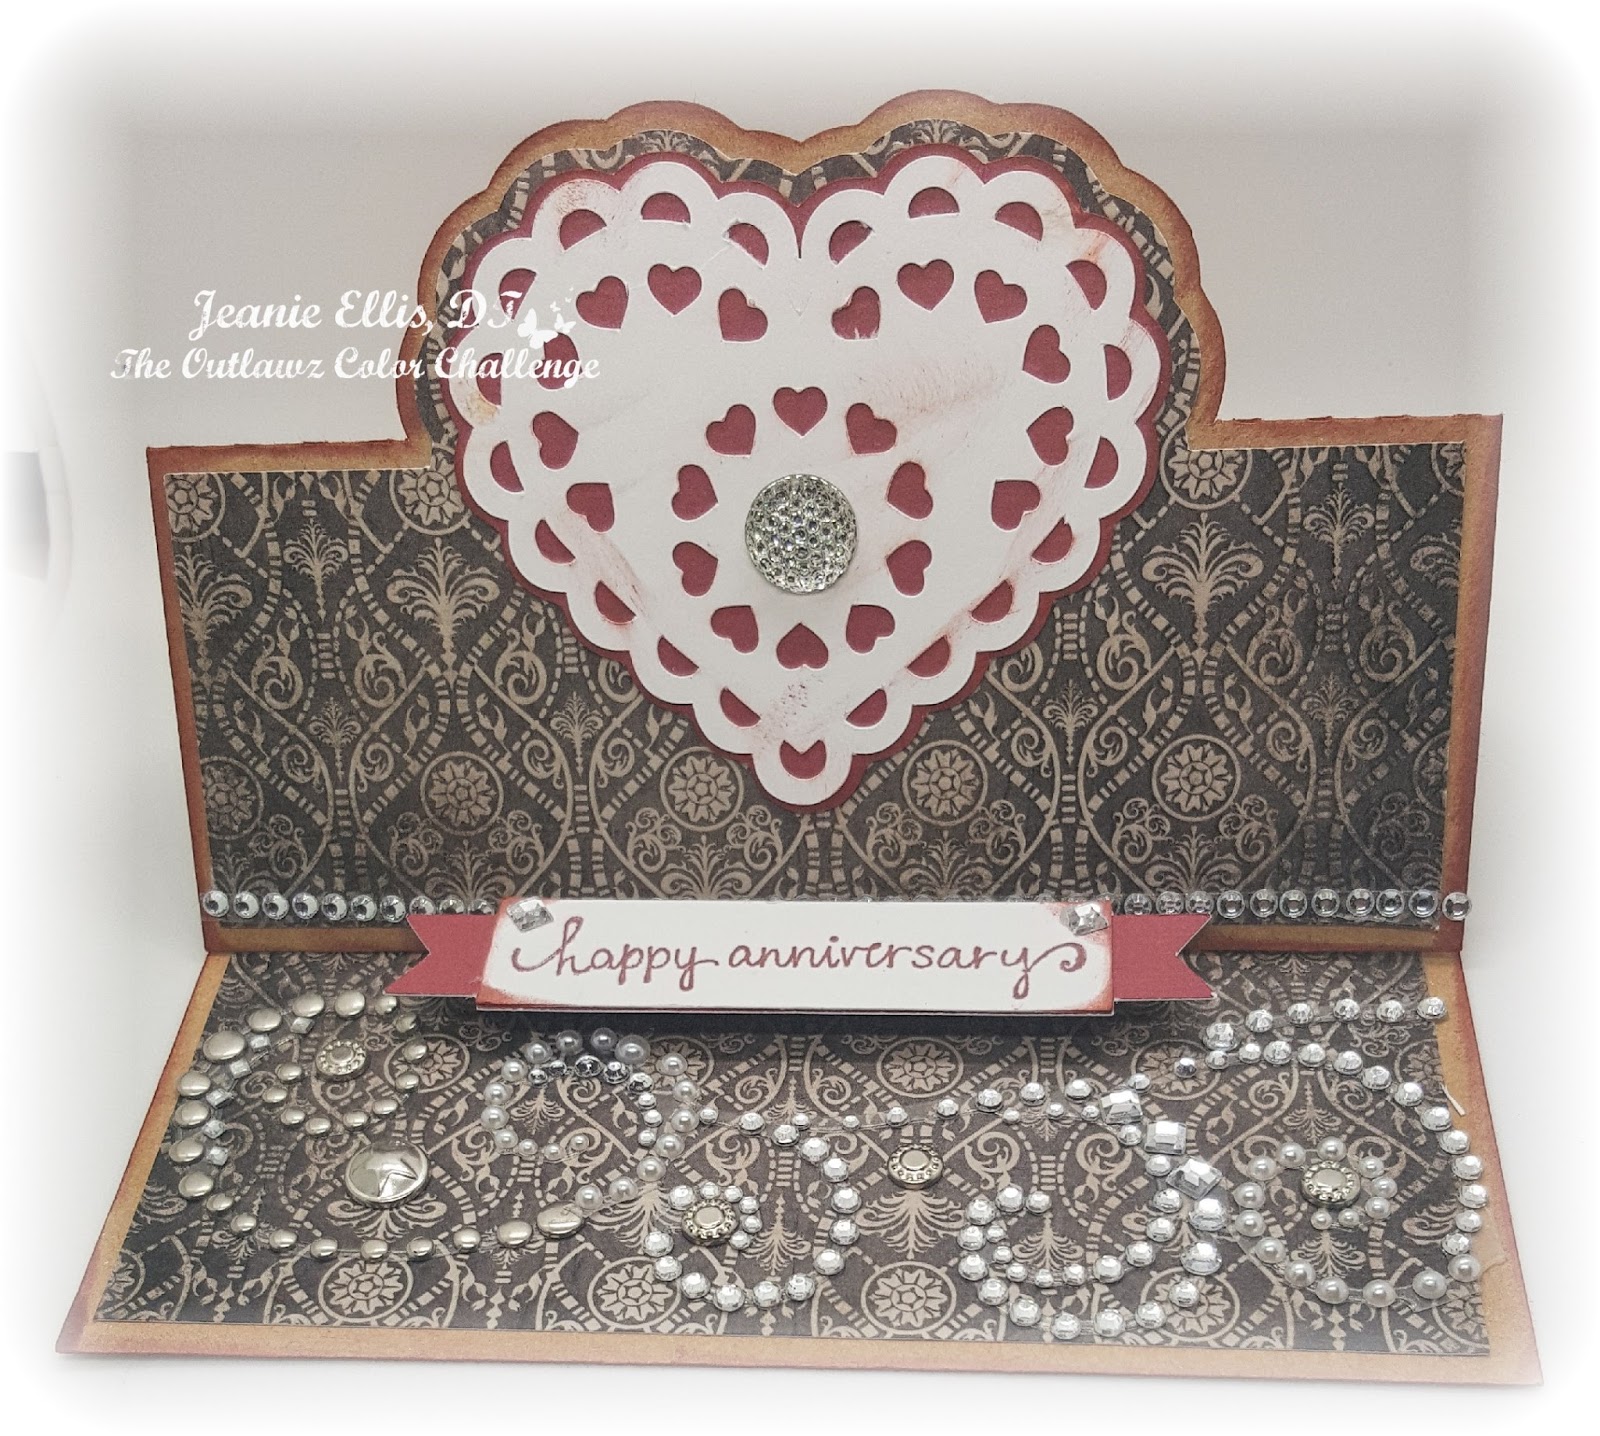
Wow! How awesome is this board? Lots of colors to choose from! And you only have to pick 3 in a row (vertical, horizontal, diagonal) with a twist of Add a Heart! Now here's my card for this week:
I admit, I added a lot of colors, but my main colors I was going for were the top row, left to right: Teal, Hot Pink, and Lime. As you can see, those are my primary colors in my card. And did I stop at 1 heart? Well, of course not! Haha! There are 3 heads in this cute monster, so it definitely needed 3 hearts! Right?

Now, I have been feeling poorly this past week...to the point of not being able to move my head without severe pain to my neck and head. So, as I was feeling somewhat better, I thought I'd go ahead and get my project done, even though the DT Admin said to take care of me, and not worry about it. She's a sweetie! This is a great group of ladies! I did have some help this time, though. Our sponsor for this month is Bugaboo Stamps, and the winner will receive 5 single digitals!! Wow!!
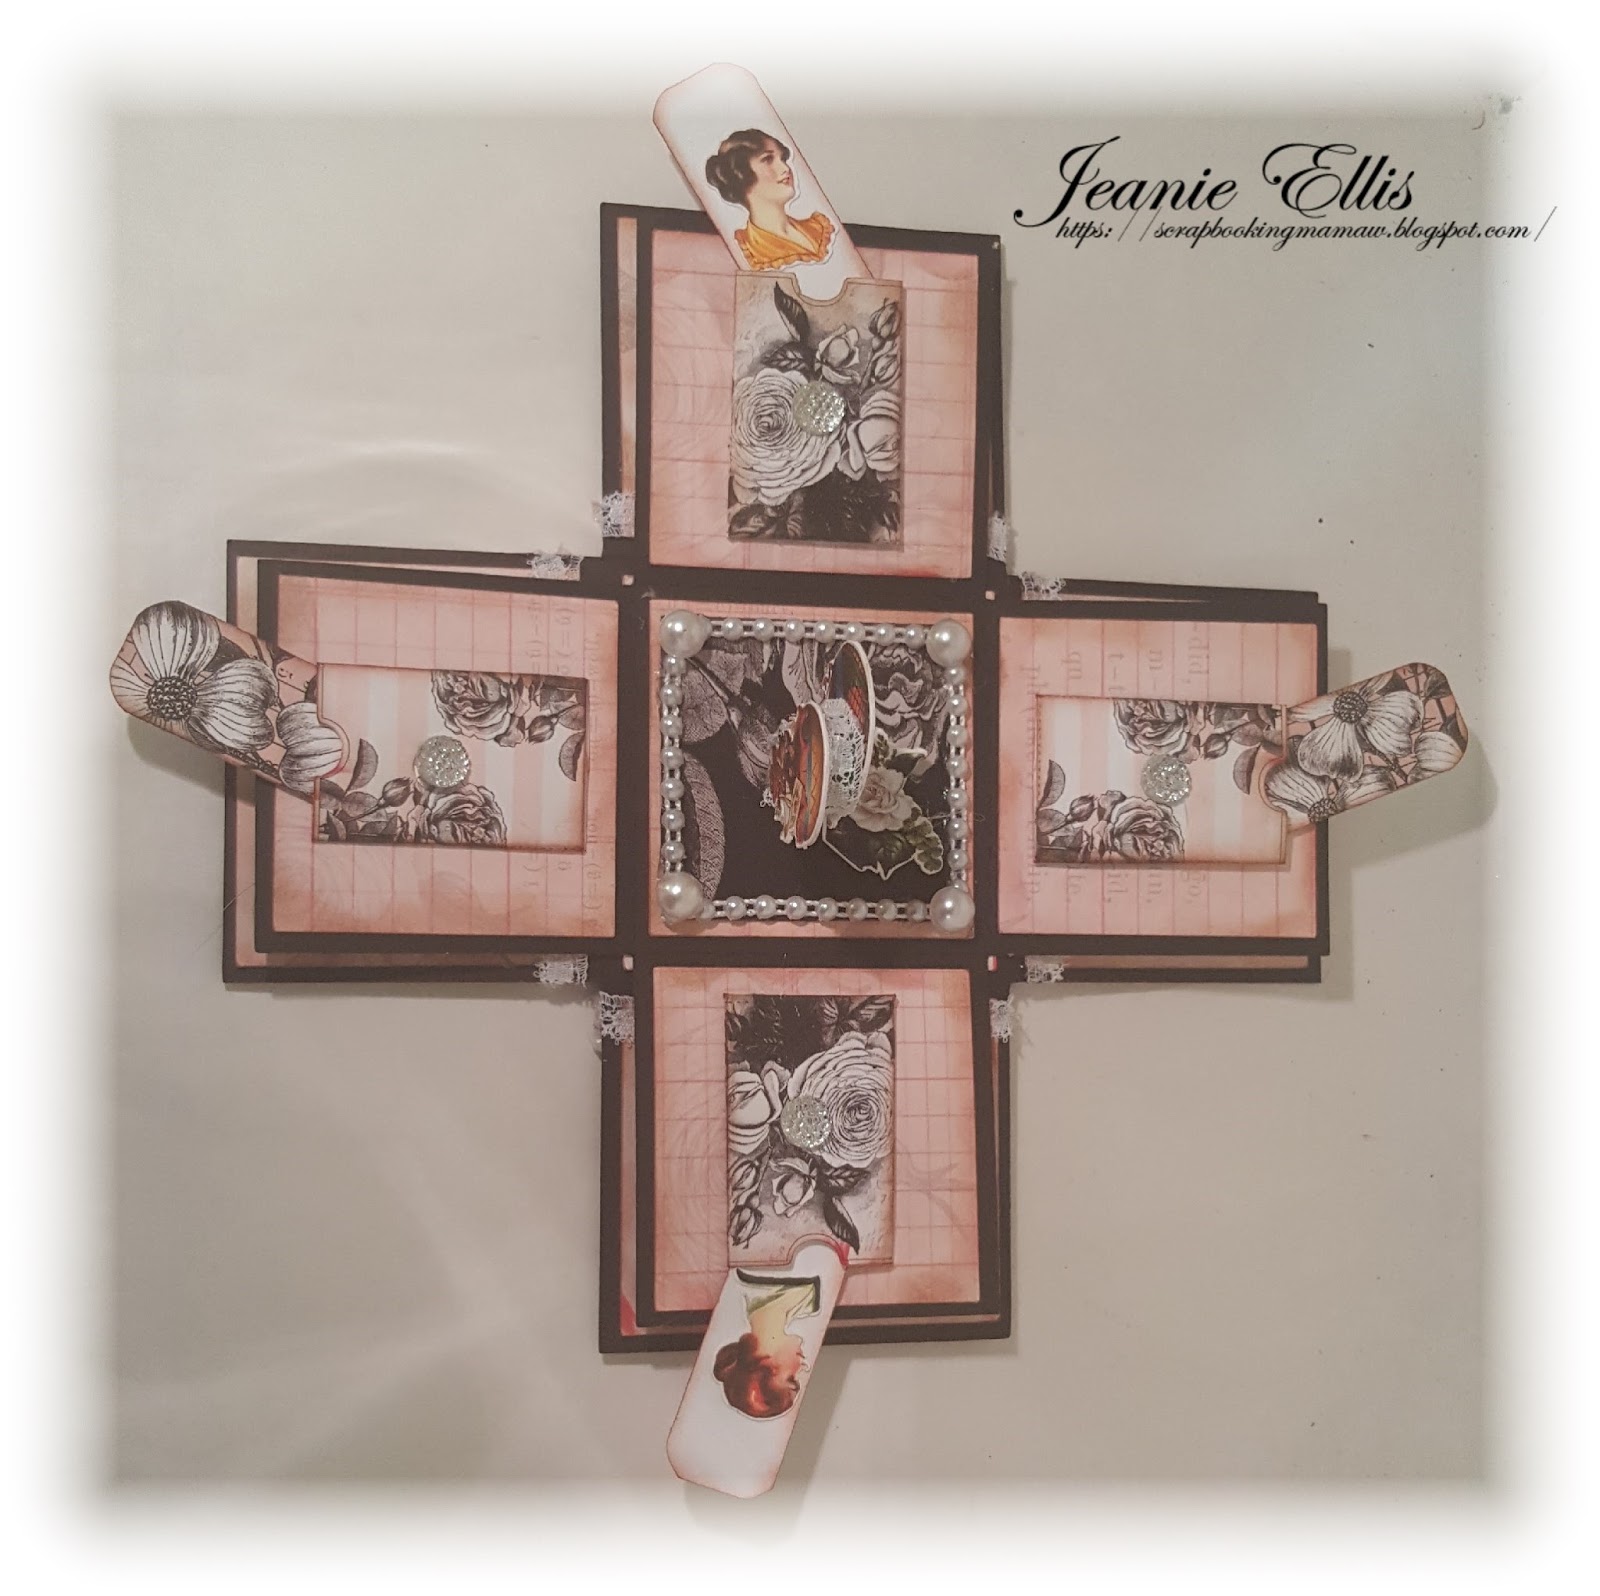
I used my Silhouette Portrait to not only cut the monster out (by Bugaboo Stamps, Monster 3), I also cut out my decorative mounting pieces too. Before I did any kind of mounting, though, I colored my digital with my Silhouette along with the polka dotted paper. My neck would not let me bend very much to do a good coloring. And since these colors were so good for this little guy, the digital coloring was perfect! I then mounted him onto the printed paper, then onto black cardstock, then onto orange (tangerine) paper, and finally onto my teal base. I then took my Silhouette and cut out 3 pink hearts. So, as you see, I got a lot of help....from my Silhouette!
I'm so glad you stopped by, and I hope you will come join us at our challenge this week!
Blessings, Jeanie Ellis - Scrapbookingmamaw

Sunday, February 12, 2017

Tsunami Rose Designs Project

Hello, crafters! I recently became a Designer with Tsunami Rose Designs Team. I'm so excited about it! So today, I want to share with you my project and several links. :-) Daisy, owner and creator of TRD, has several beautiful options of printables...so be sure to head on over to her Etsy shop and check them all out! And for inspiration, check out her Facebook fan page, join up, and share your TRD projects with us! We love seeing them! I'll share her blog links and other links here shortly on this page, so stay tuned after my project!

For this project, each of the Designers were given the Rose Noteworthy printables. I have to tell you...they are simply gorgeous!! I am so in love with these images! Without further adieu, here are some photos of my project...a Mini-Explosion Box.
Outside of Box

Closeup of Top

First Layer

Partial Layer

Last Layer

As you can see, there's a lot to this cute little box! I used my Silhouette Portrait to cut out all the papers and the shape of the layers. Let me tell you, that sure came in handy! (If I had to do it all over again, I would have originally bought the Cameo...just an FYI here.)

After I got everything cut out, it was just a matter of assembling and decorating. I had cute little pockets to put inside the last layer and made tags with them. They're tiny, but adorable! On the inside of the bottom layer, I cut out 2 of the same balloon and made them "3-D" in order to stand up on the inside of the box. The finished size, closed, is 3"x3", and 2 1/2" tall. Tiny, huh!

I loved using these printables! And I especially love the Shabby Chic look these papers have. Below, I have put in some links for you to check out TRD...I hope you stop by!

TRD Etsy shop: http://bit.ly/tsunamirose
TRD FB Fan Page: http://bit.ly/trdfbfanpage
TRD FB Group: http://bit.ly/trdfbgroup
Blessings, Jeanie Ellis - Scrapbookingmamaw


Wednesday, February 8, 2017

Crafty Gals Corner Challenges #109

Hello, fellow crafty peeps! Today starts a new week of challenges for Crafty Gals Corner. This week we are doing "Shades of Red", and we have some great sponsors for this week! Here they are:
The sponsor(s) for this challenge are:

Melonheadz
Prize: 1 Bundle of your choice - no combo packs

Fabrika Fantasy
No automatic alt text available.
Prize: 3 digital images
Some great prizes, aren't they? And be sure to check out the CGC page for some great inspirations from the Design Team! This week I used a Melonheadz image and made a tag out of it. Here it is:
Isn't she adorable? So, with my tag, I used her and a sentiment from the same group for my 1 tag. I colored her in with my Prismacolors, as well as the sentiment. I used red in the sentiment and the girl's heart. I layered some chipboard with paper and then with more paper, making a distressed edge both with a distressing tool and ink. I made a heart up on the top from a tutorial I found online. Unfortunately, I forgot to write it down. :-( If I find it I will definitely add it in. Before I placed all my goodies onto the tag, I got a heart stencil and used my texture paste on it, adding light pink glitter glass on those. I slightly pressed them into the paste and used my heat embossing gun to dry it quicker. I also used pink Versamark on the 3 hearts at the top and then sprinkled clear embossing powder on them and heated them up. 

To finish it all up, I layered everything onto the tag and added embellishments and lace. She was a lot of fun to do! I hope you come join us this week! We love seeing what you do!

Blessings, Jeanie Ellis - Scrapbookingmamaw


Tuesday, February 7, 2017

Conie Fong Facebook Free Challenge!

Hello, fellow crafters! Today I want to share with you a card I made using the Flowers in a Vase Facebook Freebie from Conie Fong. It's a beautiful image! Here it is:
I made it a pretty clean and simple card, as I didn't want to take away from the beautiful flower's Conie made. I used the paper I received from ScrapbookingwithMe Boutique when I was a guest designer last year. 

Of course, I started with my Prismacolors. Always...lol. I'm going to try to put up a video about how I do my coloring process, if nothing happens. Lol. Then I used a white card stock as my base and completely covered the front of the card with the black and white paper. This paper kit has gone a long ways in making several items! And it's so sturdy! Next, I cut a sheet of the gingham yellow paper slightly smaller than the black, added a couple sentiments and gray pearls, and put my image on with 3-D foam squares. (I've noticed I've been using 3-D foam squares A LOT lately!) She was done! See? CAS! 

I hope you go join Conie's Facebook Freebie challenge! 

Blessings, Jeanie Ellis - Scrapbookingmamaw


Outlawz Color Challenge Feb 7th

Hey! Guess what time it is? It's time for another week of challenges over at The Outlawz! I have a Color Challenge to share with you today. But first, let me show you the photo inspiration, which consisted of 3 colors.


Now, onto my project card! I decided to go with an image I had used once before, by Faery Ink called Tinkerbelle. I know Tinkerbelle has blonde hair, but I wanted to go with a different color, just for the fun of it. Here's my card:
While I realize it's not the exact same colors as in the inspiration, they are in the same line. And dark. I colored her in with my Prismacolors, and added some Diamond Stickles to give that "fairy dust" look. I used an ivory color for my base, cut a dark blue out for the mounting piece and wrapped green ribbon around it. I added stickles onto the lace also and the flower in the lower right corner. Then I put her on with some 3-D foam squares and added the sentiment. And she was done!

I hope you enjoyed this, and that you will come on over to The Outlawz and join us for this week's challenge. You'll have a lot of fun looking at all the inspiration over there! Thank you for stopping by!

Blessings, Jeanie Ellis - Scrapbookingmamaw


Through the Craft Room Door Challenge! Feb 7th

Hello once again, fellow crafty peeps! I hope the New Year has been good to you so far. I can't believe we're already in February! 

Today started another week of challenges over at Through the Craft Room Door (TTCRD for short). Our sponsor for this week is A Day for Daisies


Here's a bit about our sponsor:
A Day For Daisies provides themed categories of over 3000 digital illustrations and a fast growing line of new clear polymer stamp sets, including fairy tales and magical mermaids, cutie kids, vintage illustrations, sentiments and lovely designs for all occasions!
ADFD WEBSITE: www.adayfordaisies.com
ADFD BLOG: http://adayfordaisies.blogspot.com
ADFD FACE BOOK: http://www.facebook.com/pages/A-Day-For Daisies/142905905744876?ref=ts
ADFD ETSY: http://www.etsy.com/shop/adayfordaisies
Prize: $12 Voucher to store

Now let me show you the project I did. And honestly, I got the tutorial on YouTube. Although I searched for it again, for the life of me, I couldn't find it. The image I used for this was called Hepbern Dress. When I saw the image and the name of it, I naturally thought of all the travels Audrey Hepbern did as an Ambassador. But on the other hand, I thought of all the movies she portrayed and her classy great looks and the way she dressed. I thought she was such an elegant and refined lady! So here is my project: A travel suitcase.

Top of suitcase

Close up of image

Inside of suitcase

I hope you enjoyed this! And I hope you come join us in on the challenge! More details will be in the upcoming online magazine of Through the Craft Room Door. If you aren't a member of TTCRD and not a subscriber, I hope you become one! The magazine shows a LOT of great ideas and tutorials!

Blessings, Jeanie Ellis - Scrapbookingmamaw

Wednesday, February 1, 2017

Crafty Gals Corner Challenges #108

Hi again, crafters! Here I am to share with you another card I did for Crafty Gals Corner Challenges!
The Theme for this week is ADD SPARKLE. The sponsors for this challenge are:

Faery Ink
Faery Ink
Prize: 3 Digital Images

Star Stampz

Prize: 3 Digital Images

For my card, I chose the Wedded Bliss by Faery Ink. I had a lot of fun doing this image for my card. Here it is:

I wanted to add a closeup of this card so you could see the sparkle better in her veil. This was a total experiment for me. I had never done one like this before. But I'm so glad it worked! Here's my process....First, of course, I used my Prismacolors to color the image. To make her skin look lighter under the veil, I used my white Prismacolor. That way when I did her skin tones, it would be lighter and look more realistic.

I then made a card base out of white cardstock for the foundation. Then I took a printed piece of cardstock and used the Tim Holtz distressing tool around the edge of it. I mounted it onto the base. I hot glued...sparingly...some white lace on the left side of the printed piece along the edge of the bride's side, used some Glossy Accents and sprinkled Diamond Glass Glitter from Reneaubouquets Shop. I also added some of the glass glitter along the groom's side.

I added 3-D foam on the back of the image so it would stand out better on the card. I used Stickles on the bouquet and on her hair piece. For the veil, for lack of a better explanation on "paper", I used the same Stickles and "skipped" it gently along the lines of the veil so it would give an illusion of "see-through". The last thing I added was the butterfly, also from Reneabouquets.

I hope you enjoyed this! And I hope you join us in this week's challenges! See you there!
Blessings, Jeanie Ellis - Scrapbookingmamaw

I've entered this card into the following challenges:
Kraftin' Kimmie Stamps - Anything Goes
Creative Moments - Anything Goes (#110)
Word Art Wednesday - Anything Goes (weeks #268-269)
Crafty Sentiments Design - Lace and/or Ribbon