VintageMadeForYou

Wednesday, May 31, 2017
Crafty Gals Corner Challenge #125-Anything Goes!
Hello everyone! Today is the beginning of a new challenge over here at Crafty Gals Corner Challenges! We sure hope you can join us! And here are our amazing sponsors for this week's theme: Anything Goes! The sponsor(s) for this challenge are:

SheepSki Designs

Prize: 3 Digital Images
I want to share with you now my project for this week. As I have mentioned before, I LOVE making tags. I have collected many through swaps, but I sure have a lot I've made still in my Iris Container! I keep them for just the right person at the right time. Now here is my new tag, using Kasmin from SheepSki Designs:

I have to tell you....I love Andrea's digitals! And this one is no exception!
My Process:
I first colored my digital using my markers. Then I cut out a tag shape from my Tim Holtz collection, Paper Stash. I got that through ScrapbookingwithM.E. Boutique. I then got my Tim Holtz Brick stencil and spread Liquitex Glass Beads (also from the Boutique) over various areas of the tag. Once I let that dry, I got out my TH Rusty Hinge Distress Ink and "smooshed" (for lack of a better word) onto my mat, squirted some water on that, and brushed it over the brick areas on my tag. I love the result! I dried the ink with my heat gun and then layered laces and pearl drop strands on top. At the bottom I added more laces, and a large flower with pearl sprays. At the top you see a hummingbird I bought through through Reneabouquets.
I was totally excited about how much the colors all matched so well with each other! Oh, before I forget, I also stained the tie at the top with the same distress ink on the brick. I heat dried it so it would be permanent.
I hope you give a go at making something for this week's challenge! And thanks for stopping by!
Blessings, Jeanie Ellis - Scrapbookingmamaw
ScrapbookingwithMe GDT Tutorial
Hello, fellow crafters! Today I just want to share with you my 3rd and final project as one of the Guest Designers in the Month of May for ScrapbookingwithM.E. Boutique! I had a LOT of fun doing these tutorials! Please check out my video making a Mixed Media Tag using Tim Holtz product! And there's still time to shop the online store using the code JE10 to get 10% off through May 31st!
Tuesday, May 30, 2017
Outlawz Color Challenge May 30th
Howdy, crafty pardners! It's time once again for another Color Challenge over at The Outlawz! Our sponsor for this month is the amazing Mari Digis Designs!


Here is the Photo Inspiration from one of our Design Team Members, Cara:

If you'll enlarge the inspiration photo, you'll see that the Twist is At the Seaside. I love the colors in this photo! It's so serene! Now here is my card:

I chose to do a Lighthouse for this project, because that's the first thing I thought of when I saw the photo inspiration. So I went searching for a Lighthouse....and came across a new digital store for me, Oak Pond Creations. I hop that this store continues on designing, as I noticed the last time they blogged was in December of last year. Thankfully, the digitals are still available to order. Yay! Keep up the good work, Oak Pond!
About the Process:
I cut out my image first, then colored it in. I then took a piece of white cardstock that would fit around the lighthouse and give me room to put a sentiment on it. I used Tim Holtz Distress Inks to color in the background, making circular motions and using two colors. I mounted the Lighthouse onto the newly colored paper and added the seagulls at the top and the sentiment. Then I mounted that cardstock onto the tan background and onto the white base card foundation.
After I did all that, I took Stickles and colored in various places of the lighthouse and the light illuminating from the Lighthouse.
I hope you enjoyed this project of mine today, and that you will join in on the fun at The Outlawz! Thank you so much for stopping by!
Blessings, Jeanie Ellis - Scrapbookingmamaw
TTCRD May 30th Anything Goes Challenge!
Hello, fellow crafters! Today starts a new challenge over at TTCRD (Through the Craft Room Door)! And for this week, we have the fabulous sponsor: Decosses Dynamite Doodles

Now here's a little bit about our sponsor:
Are you interested in digital sentiments, papers and other embellishments? How about a badge made especially for your blog? If these are items you are interested in, you are going to want to check out Décosse's Dynamite Doodles. My name is Lisa and with over 150+ posts of freebies to choose from, and new ones added often, I just might have what you are looking for. Along with the freebies I offer, I also create blog badges, digital paper packs and scrapbooking kits. Additionally, I'm so excited to now be sponsoring giveaways and challenges at other blogs. It is my honour to be able to sponsor this challenge for Through the Craftroom Door!


Monday, May 29, 2017
Whisker Graphics DT Project - Bucket Treats!

This was SO MUCH FUN! It was something new for me, as I had never altered a bucket before. Needless to say, it was a lot easier to do than I thought. Here is my project:

Outside of Buckets

Inside of Bucket
For this project, I used 2 buckets, the small one and the larger one. I also used twine, stickers, and bags. For more about the details of how I did this project, please visit the WG Blog.
Thank you so much for stopping by! Be sure to check out projects from other Designers on the blog!
Blessings, Jeanie Ellis - Scrapbookingmamaw
Tsunami Rose Designs DT Project
Hello, crafters! I'm so glad you stopped by! Today I want to share with you my most recent project for Tsunami Rose Designs (TRD). This time, I was picked an Artist's Choice project, so I thought I'd make some ATCs (Altered Trading Cards). I used the Kitten Memoirs digital kit. These are some beautiful papers!
So now, here are my cards:


So now, here are my cards:


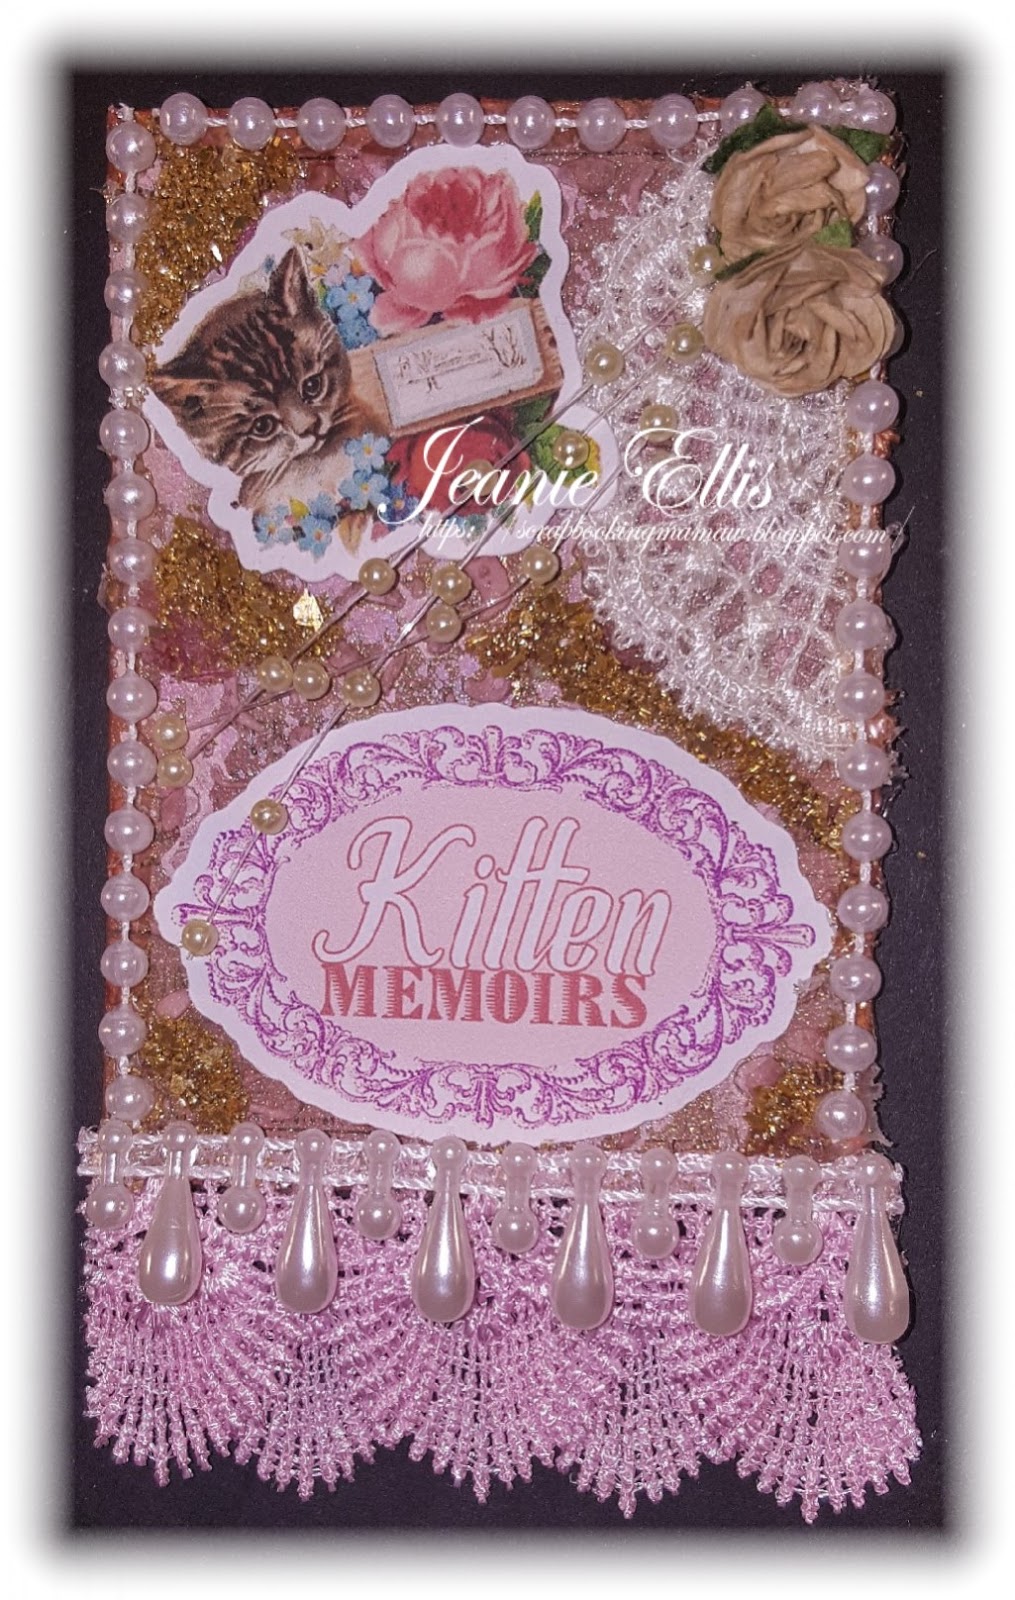

I made this cards just like I would any other mixed media project. I started out with 2.5"x3.5", then printed out some of the digital papers and covered each of the 4 cards. I used Mod Podge to adhere the papers and covered them using a stencil and texture paste. Of course, bling was added...of course! Laces, pearls, and diamond glitters gave these pieces their individual "bling".
Below are links to the shop, Facebook page, blog, and YouTube. I hope you visit each one! Thank you for stopping by!
Blessings, Jeanie Ellis - Scrapbookingmamaw
Tuesday, May 23, 2017
The Outlawz Color Challenge - May 23rd
Hello, fellow crafty pardners! I'm so glad you stopped by! Today starts the new Color Challenge over at The Outlawz! And our sponsor for the month of May is Mari Digis Designs.


Here is our Theme for this week: Monochromatic! I love monochromatic! It can be any color, as long as it's in the same color family. Here is a sample of color:

One of our DT's used these colors, and it looks fantastic! Now on to my card:

I'm not one to really say, wow! I love the card I just made! But I really do like this one! The colors came together quite well! I was concerned that the butterfly colors wouldn't work, but they matched almost perfectly!
Of course, I normally start out with coloring a digital if I use one, then make my card base. But in this case, I made my butterfly the day before. I had actually made 2, but only needed one on the card. I used a Tim Holtz butterfly die which has an embossing butterfly with the die. I used white card stock for the embossed part and black for the intricate die. (TIP: Placing the die onto a couple of folded fabric softener sheets and then running it through your machine will help pull the excess pieces away from the die once you cut it onto your card stock.) Once I had both pieces cut out, I adhered them with my Art Glitter Glue, then took colored Stickles in various places of the butterfly, including the body. After that dried, I used Glossy Accents all over the butterfly and sprinkled diamond glitter glass from Reneabouquets. I let that set overnight. I wish you could see the sparkle in this butterfly!
I made the card base out of white and distressed it with TH distressing inks. I cut out a piece of printed card stock into the form of what looks like a "K" and a slim piece to put underneath it on the left side of the "K". I used my distressing tool to distress each side of the paper.
I hot glued a piece of lace on top of the printed card stock, then some white twine in the center on top of that. I placed some white leaves and pearls sprays, then added the flower. Lastly, I hot glued my butterfly onto the card, next to the flower.
I hope you enjoyed this card! And I definitely hope you join in on the challenge this week!
Blessings, Jeanie Ellis - Scrapbookingmamaw
Challenges I entered into:
Crafty Sentiments - Anything Goes May 23rd
Fairy Tale Challenge - Things with Wings #169
Magnolia-licious Challenge #9 - Anything Goes Optional Summer
Paper Minutes #488 - Butterflies
Tuesday Throwdown #344 - Anything Goes
Wednesday, May 17, 2017
Crafty Gals Corner Challenge #123 - Flowers
Hi, crafty peeps! Today has started a new challenge over at Crafty Gals Corner! I sure hope you can join us this week. This week is one of my favorite challenges: Flowers. I love making flowers, although my arthritis in my hands make it more difficult nowadays. Our sponsors for this week are:
Digital Delights

 Prize: 3 Winners!!
1. $10 Gift Certifcate
2. 1 Digital Image
3. 1 Digital Image
Prize: $5 Gift Certificate

1. $10 Gift Certifcate
2. 1 Digital Image
3. 1 Digital Image
share fun & inspiration, receive freebies and special deals. See you there!
Let me show you what I created with my digital, Daisy Girl. She was so fun to color...plus she has a flower already in her hands, so that made it easier to do the theme, don't you think? 😉


I started first off by coloring her with my markers. Then I set her aside and cut out my base card and embossed the front of it, with flowers. I mounted a white piece of cardstock on top of that with gold foiled hearts (hearts and flowers go together, right?). I then cut out some flower petal layers and put them together, making 3 of them. Oh, before I forget, I used my Silhouette to print out designer paper and used it to cut my flowers out. I then layered everything together...Daisy Girl, flowers, sentiment, etc. And she was done!
I hope that you join us this week! Thanks for stopping by!
Blessings, Jeanie Ellis - Scrapbookingmamaw
Tuesday, May 16, 2017
Outlawz Color Challenge May 16th
Hello, crafty pardners! It's so good to "meet" you here again! Can you believe that we're in the middle of May already?? Mother's Day has already come and passed! That means it's time for another challenge here at The Outlawz. Our sponsor for the month of May is Mari Digis Designs.
So, now on to this week's photo inspiration. This is such a lovely photo...the colors are unique and so pretty! They remind me of Spring. Here it is:


See what I mean? So many options! Now on to my project:

This image is called C12. Isn't she adorable? With the colors of the photo inspiration inspiring Spring in me, I decided to use the bright of colors as much as possible. I used my markers to color her. On the background of the tag, I used designer paper I had in my stash, then stenciled flowers on the background, and lastly added lace in angles. I also added flowers I made and rhinestone. A little glue glitter was used on her hat, clothes and shoes. I trimmed the outside of the tag with a corded yellow trim, adding lace and pearls to the bottom. On the upper right corner I added a hummingbird from Reneabouquets.
I hope you come by and join in on the challenge! It's anything goes...just make sure you use 3 colors or more from the photo.
Thank you for stopping by!
Blessings, Jeanie Ellis - Scrapbookingmamaw
Through the Craft Room Challenge May 16th
Hi, fellow crafters! We've started another Challenge over at Through the Craft Room Door! Our sponsor for this week is Crafty Sentiments!

Prize: 3 Digital Images
A Little Bit About Our Sponsor:
Crafty Sentiments Designs started back in 2009 by myself Suzette the owner, Me and my artist brings you cute whimsical and fun characters, to create unique and exciting handmade gifts and projects. We also carry our own brand of exclusive Rubber stamps, Digital stamps, Sentiments and cutting dies, CD Roms that is perfect for all your scrapbooking and card making needs, there is always something new each month as we release new images each month. Crafty Sentiments Designs is now having live shows on Hochanda.TV a UK base craft channel. Visit the website at www.craftysentimentsdesigns.co.uk for lots of products.
Be sure to check out their site! Now on to my Tag Money Card using the Blitz with Present image.

Outside of Tag Pocket (see her peeking out?)

Tag Pocket and Card

Close Up
I thought I'd better get a start on my Christmas cards, as each year I try to hurry and get them done...and end up forgetting someone! Not good! I had a lot of fun with doing a different kind of tag! But to find out my supplies used, check out our upcoming TTCRD magazine!
Thanks for stopping by! I hope you will join us this week!
Blessings, Jeanie Ellis - Scrapbookingmamaw
Monday, May 15, 2017
ScrapbookingwithM.E. GDT #2 Project
Hello, crafters! I want to share with you my 2nd Project with ScrapbookingwithM.E. Boutique as one of their Guest Designers for this month! I had a lot of fun making this one! I will share links below for products used...plus you can check out my YouTube Channel for the video! Now on to my project!
I wanted to do something just a little differently than I've done before, and yet on the same line as a Home Decor. This one involved using 5-5x7" flat panel canvases. Here it is:


Links:
FB Boutique: http://goo.gl/CSN2a5
Online Store: http://www.scrapbookingwithme.com
Members room: http://goo.gl/E6h4uO
Our Blog: http://goo.gl/OUhL1i
SWMEB Youtube: http://goo.gl/8E28BO
Products you are using in your video -
Tim Holtz - Paper Stash, Etc, - goo.gl/HTlqj1
Tim Holtz - Botanical Elements - goo.gl/t391Ac
Tim Holtz - Flowers - goo.gl/pd2cvc
Art Glitter Glue - http://www.scrapbookingwithme.com/sto...
ATG tape 1/4" x 36 yds - goo.gl/rm1vtz
Ranger ~ Liquid Pearls .5oz. -Ancient Gold - goo.gl/sK7ara
I wanted to do something just a little differently than I've done before, and yet on the same line as a Home Decor. This one involved using 5-5x7" flat panel canvases. Here it is:

Full View of Completed Project

Angled View of Project
I wanted to give this a feeling of a "garden", using the Botannical Ephemera by Tim Holtz. (All links will be given below.) I had a video of the actual process, and then things happened. I lost my process video with weather and unforeseen incidents. I wasn't a happy camper. let me tell you! So instead I shared how I did the process and also did a little tutorial in the video. Please be sure to check it out below.
My Process:
Each canvas was covered with the TH Paper Stash. I used my Art Glitter Glue to adhere lace around each of the sides of the canvases. I then used TH Distress Ink around the edges of the laces to give it more of an antique look to it. After sorting all the ephemera, I placed ones I wanted to be together in piles, and then started adhering them to the canvases. Some of them were glued on flat, and other pieces I used 3D foam to raise them. The frame on the very last canvas (last one on right), is one I cut out using a TH die and gave it a "glassy" look. The tutorial is on that.
My husband got out his handy dandy tools and wood pieces, and put the canvases together for me. I also had him put smaller pieces of wood between the canvases that I wanted raised some. I knew foam squares wouldn't work for this.
Here is my video. I hope you enjoy it!
I hope you will check out the links to the boutique (both on Facebook and the Online Store), and also to my YouTube video! Here are links to the boutique and product below:
10% Discount when you shop the Online Store and use Code JE10!
FB Boutique: http://goo.gl/CSN2a5
Online Store: http://www.scrapbookingwithme.com
Members room: http://goo.gl/E6h4uO
Our Blog: http://goo.gl/OUhL1i
SWMEB Youtube: http://goo.gl/8E28BO
Products you are using in your video -
Tim Holtz - Paper Stash, Etc, - goo.gl/HTlqj1
Tim Holtz - Botanical Elements - goo.gl/t391Ac
Tim Holtz - Flowers - goo.gl/pd2cvc
Art Glitter Glue - http://www.scrapbookingwithme.com/sto...
ATG tape 1/4" x 36 yds - goo.gl/rm1vtz
Ranger ~ Liquid Pearls .5oz. -Ancient Gold - goo.gl/sK7ara
Thank you for stopping by!
Blessings, Jeanie Ellis - Scrapbookingmamaw
Saturday, May 13, 2017
Tsunami Rose Designs DT Project Share
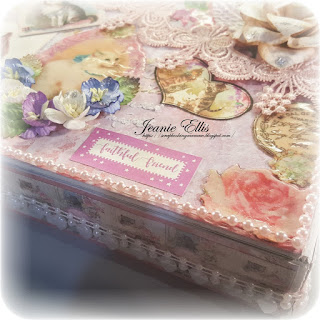
Hello, fellow crafters! It's time once again for another project share from Tsunami Rose Designs (TRD)! I will share more links below. 👀 I love using this journal kit! It's called Kitten Memoirs, and since I have a kitty named Mittens, I thought it would be perfect to alter a cigar box and put pictures, memorabilia, and so on in it. Can you tell I love my cat?
So here is what I came up with:


So here is what I came up with:

Top View

Top Angled View

Front View

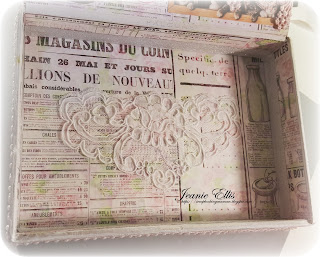
Inside Top View

Inside Bottom View

Another Top Angled View
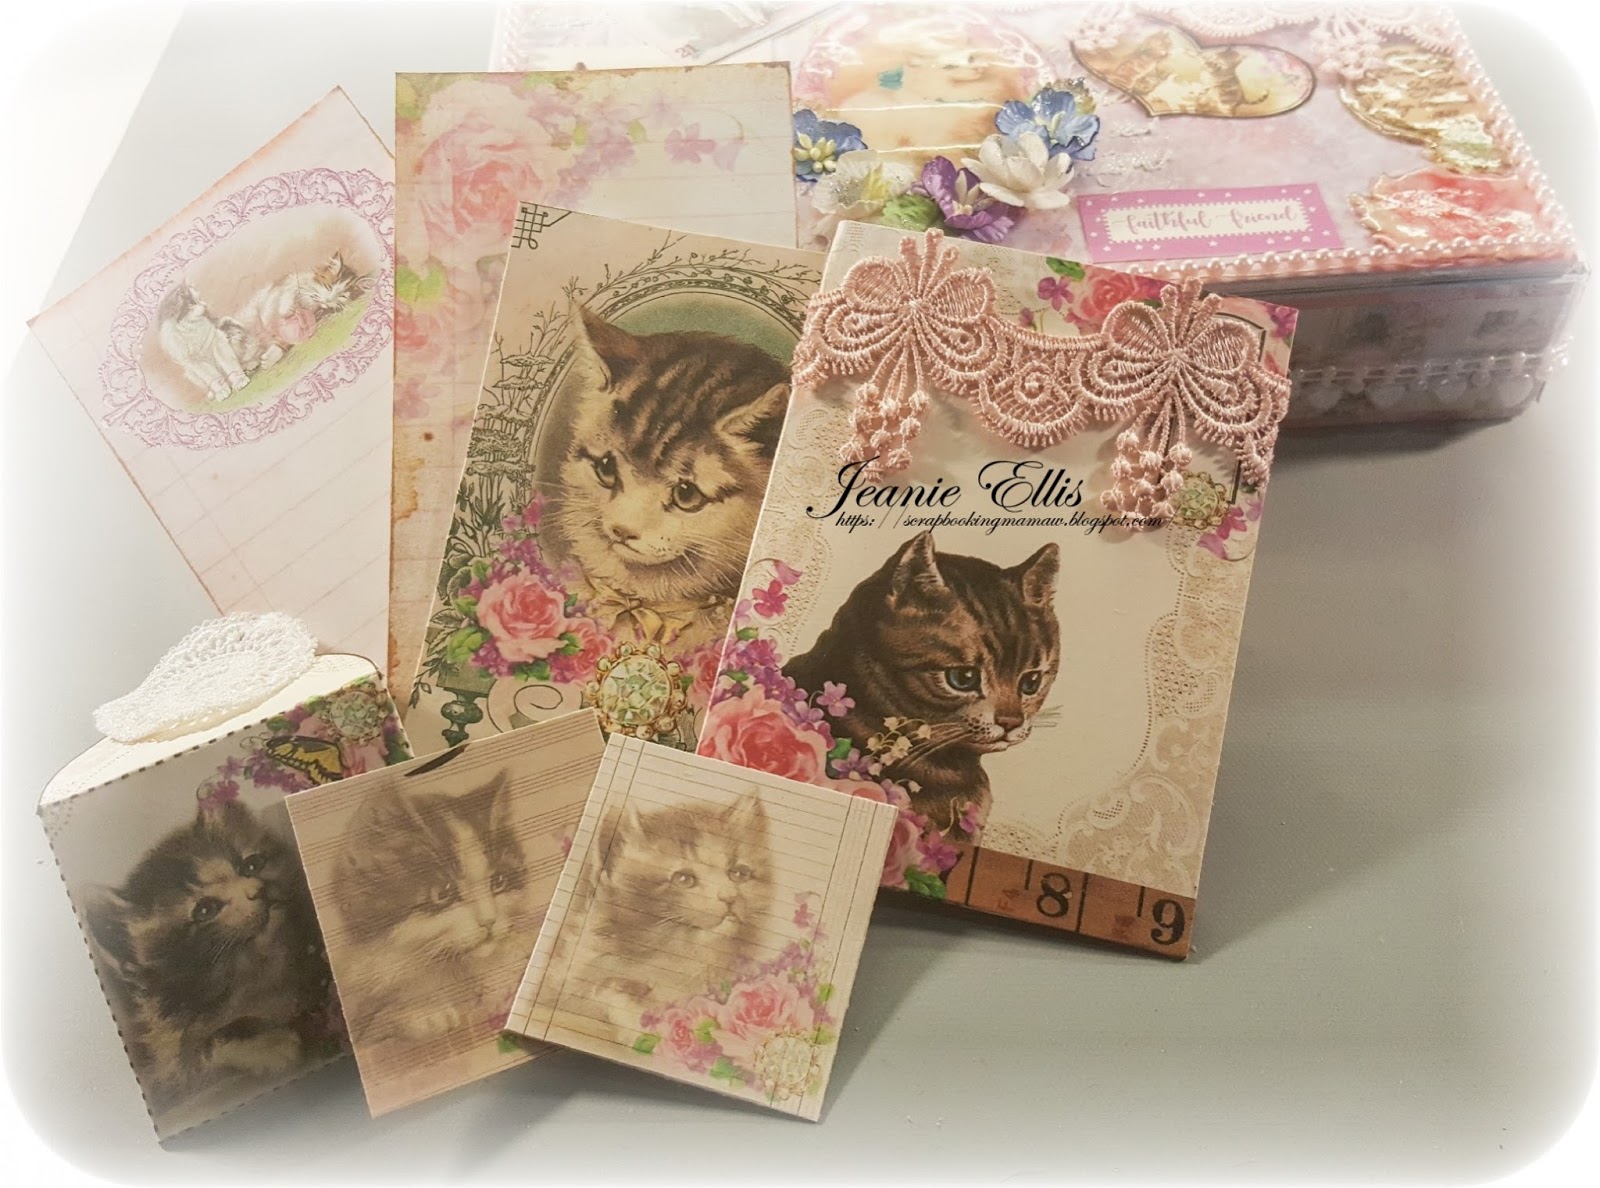
Tags with Pockets
I love these papers! They print so clearly! Altering this was a lot of fun! I always use Gesso on my projects first, unless they're going to be completely covered with paper. As for this box, I wanted to leave a little white around the edging, hence using the Gesso. Once I painted it, I set it aside to dry so I could work on the papers I wanted to print out. I then covered the outside with some solid cardstock I had in my stash, and then used various cards and such for the decorations.
I fussy cut a few pieces out and gave them a "glass" look by coating them with double embossing clear powder. Then I cut out my journal cards. I used one of them as a pocket for my larger tags (the one with the pink lace on front of it). All those were placed inside the cigar box.
Inside the box, I used TRD Kitty Memoirs paper to cover. I also decorated the inside of the lid. One of the decorations is a pocket with mini-tags. I also used silver glitter washi tape on the inside edge of the box and an applique on the inside bottom, just to give it a little more "pizzaz"!
Now, I also want to mention that I used some Prima mist spray to give the colors on the outside papers a little less of brightness to it. That was just to give it more of a shabby chic look to it. I was very pleased with the colors.
I hope you enjoyed this project! Please be sure to check out all the links below to Tsunami Rose Designs!
Blessings, Jeanie Ellis - Scrapbookingmamaw
Tuesday, May 9, 2017
The Outlawz Color Challenge - May 9th
Hello, everyone! Today I want to share with you this week's Color Challenge over at The Outlawz!
This month our sponsor, Mari Digital Designs, has given us 3 digitals to play with, and we will give those digis to our lucky winner!


This month our sponsor, Mari Digital Designs, has given us 3 digitals to play with, and we will give those digis to our lucky winner!

Here is the Photo Inspiration for this week:

Use 3 of the 5 Colors - Name the colors
Pretty colors! Very unique! Now here is my card for this week:

I used the kind of rusty/tan color, blue, and yellow. I used my markers to color her rather than my Prismacolors this time, as I'm trying to "stretch my comfort zone". After I colored her, I embossed my card foundation, then layered a lattice die cut on top of that. I then placed the digital on top, adhering her with 3d foam squares. I added flowers to add more color to the card.
I love white on white cards, with a pop of color! So don't be surprised if you see more in my future! ;)
I hope you join us for this week's challenge! It's always wonderful to see all the talent out there! Thank you for stopping by!
Blessings, Jeanie Ellis - Scrapbookingmamaw
Saturday, May 6, 2017
New Stamp Launch Today with $15 Blog Hop Prize!
Hello, everyone! Today, the new stamp, Italian Greyhound by JessicaLynnOriginal, has launched! And with it, a blog hop with a prize of $15 to the shop! You must comment on each blog in order to be eligible for the prize!
Here is a list from Jessica's Blog:
Here is a list from Jessica's Blog:
- JessicaLynnOriginal Blog
- Carolyn Ellenberg LaBille
- Jeanie Ellis - LINK FOR MY 3rd AND FINAL CARD HERE
- Kelli Horger
- Lisa Bzibziak
- Patti Krauss
- Tasha Jorgensen
Remember, you MUST comment on all of the blogs to be eligible...so have fun!
Thanks for stopping by! And have fun!
Blessings, Jeanie Ellis - Scrapbookingmamaw
Friday, May 5, 2017
JessicaLynnOriginal Card Reveal #3!
Hello, crafty peeps! Today I want to share my 3rd and final card reveal for the new Italian Greyhound Stamp Set from JessicaLynnOriginal, which will launch May 6th. You can pre-order this set before Saturday, May 6th! Here is the set:

I'm excited to be able to share with you my card as a part of the JessicaLynnOriginal Design Team! Here is my card:
 I wanted to do something a little bit different for this stamp set, so I went with the step card. I got the inspiration from Pinterest. I forgot to save it to my board so I could link it up, but if you do a search you'll be able to find similar ones. Once I got the idea, I just tweaked it up to suit what I needed, accordingly. I used paper I had in my stash. The sentiment was printed on white cardstock and cut out using a rectangle stitch die cut frame I bought from Jessica's online store. I also cut out the mounting piece with the same die cut.
I used markers to color in my dog dish and greyhounds. I love the front one! She looks like she's afraid to step into the grass. Hmmm...maybe it's wet? I know our dog does NOT like to step into wet grass! The flowers were also cut out with a small set of flower die cuts that I was gifted. They were perfect for this card!
I'm excited to be able to share with you my card as a part of the JessicaLynnOriginal Design Team! Here is my card:

I used markers to color in my dog dish and greyhounds. I love the front one! She looks like she's afraid to step into the grass. Hmmm...maybe it's wet? I know our dog does NOT like to step into wet grass! The flowers were also cut out with a small set of flower die cuts that I was gifted. They were perfect for this card!
I hope you enjoyed this card! Be sure to check out the other Design Team Members!
- JessicaLynnMould (JessicaLynnOriginal’s Official Blog)
- Carolyn Ellenberg LaBille
- Jeanie Ellis - YOU ARE HERE
- Kelli Horger
- Lisa Bzibziak
- Patti Krauss
- Tasha Jorgensen
Also check out Jessica's video about this cute stamp set HERE!
Thank you so much for stopping by!
Blessings, Jeanie Ellis - Scrapbookingmamaw
Wednesday, May 3, 2017
JessicaLynnOriginal New Stamp Reveal Card #2!
Hello, everyone! JessicaLynnOriginal is launching another stamp set! This one is the Italian Greyhound Stamp Set, which will launch May 6th. You can pre-order this set before Saturday, May 6th! Here is the set:
I'm excited to be a part of this team! So doing these cards is a real pleasure for me! Look at all the different stamps to this set! Awesome! Now let me share with you the 2nd of my 3 cards. And be sure to come back to check out the other 3rd card that I will be sharing!

I'm excited to be a part of this team! So doing these cards is a real pleasure for me! Look at all the different stamps to this set! Awesome! Now let me share with you the 2nd of my 3 cards. And be sure to come back to check out the other 3rd card that I will be sharing!

I decided to use the headshot of the Greyhound for this card, put him on a heart cutout, and then use the sentiment "I love my Greyhound". The heart made perfect sense for the sentiment! I colored him first with my markers and then attached him to the card using 3d foam adhesives. I used black and red ribbon around the top and left side, placed a ribbon with 3 roses on the intersecting mark of the ribbon, added pearls to the bottom left of the card, and lastly added a small butterfly. Again, Jessica has added a little paw print to this set, and I LOVE the paw print! So cute!
I hope you enjoyed this card! Be sure to check out the other Design Team Members!
- JessicaLynnMould (JessicaLynnOriginal’s Official Blog)
- Carolyn Ellenberg LaBille
- Jeanie Ellis - YOU ARE HERE
- Kelli Horger
- Lisa Bzibziak
- Patti Krauss
- Tasha Jorgensen
Also check out Jessica's video about this cute stamp set HERE!
Thank you so much for stopping by!
Blessings, Jeanie Ellis - Scrapbookingmamaw
Crafty Gals Corner Challenge #121 - CAS (Clean and Simple)
Hello, my fellow crafters! We began a new challenge over at the Crafty Gals Corner this morning. Be sure to check out winners for last week too...you may be one! The theme for this week is CAS (Clean and Simple). Don't go overboard, in other words...which I tend to do on many occasions! Our amazing sponsors for this week are:
Sparkle N Sprinkle

Prize: $15 Gift Certificate


Sparkle N Sprinkle
Prize: $15 Gift Certificate
Prize: 3 Digital Images

Prize: 1 digital image
How awesome is this! Three sponsors! For my project, I used the Victorian Lizabeth from Lacy Sunshine. I had a lot of fun coloring her up! Here is my card:

As you can see, it is definitely clean and simple. The color focus is totally on the digital with only a small red ribbon at the top. I kept the card all white. I cut out 2 pieces...one was for the mounting piece on top of the card base which I embossed, and another piece on top of that which has a lattice work to it. I mounted her with 3d foam squares to give her a little "pop up". And she was done! Clean and simple!
I hope you come by and join us! Clean and simple is easy, quick, and fun!
Blessings, Jeanie Ellis - Scrapbookingmamaw
I hope you come by and join us! Clean and simple is easy, quick, and fun!
Blessings, Jeanie Ellis - Scrapbookingmamaw
Subscribe to:
Posts (Atom)