Showing posts with label Tags. Show all posts

Saturday, January 2, 2021

NEW CHALLENGE - TAYLORMADECARDS4U!

  Hello everyone! I am excited to announce that a new monthly challenge site has started this month, January 2nd, 2021! And I am a part of that design team! (Yay, me!) This challenge, from TaylorMadeCards4U begins on the first Saturday of each month and end the last day of the month.

We as The Design Team will be inspiring you using the optional theme. You can choose to use the theme or participate with anything goes. It is completely up to you.

We will be using digital images from Taylormadecards4u and we will pick a winner at the end of each challenge.  The winner will be announced on the 5th of the following month on the TMC4U blog and will receive a $10 Gift Code to use on any digital item in the shop. 

To help you get started, feel free to use the January calendar posted on the TaylorMadeCards4U blog for your first project in January. Our theme will be Friendship. You can find a list of all the themes for the year on the challenge tab on the blog.

Here is a sample of what I did for my January project (Pocket with Tags)! I've also included a link to my video!


Before I forget, here is what the digital papers look like, that I used for my project. 


Thank you so much for stopping in! I hope that you will join us on the new challenge! And have fun! Be sure to spread the word! See ya there!

Blessings, Jeanie Ellis - Scrapbookingmamaw


Wednesday, November 21, 2018

Crafty Gals Corner Challenge #179 - Fall Colors

Hello! Here it is again, another new challenge from Crafty Gals Corner Challenge Blog!  And this time we have the theme of  FALL COLORS!  Our sponsors are:
This week the challenge is: Fall Colours


Our sponsors this week are:

Polkadoodles
Prize ~ $15 Gift Certificate


Prize: $10 Gift Certificate for Images Only 


Prize: 3 Digital Images

Wow! Who can believe that it's almost Thanksgiving and Christmas is just around the corner?? Another year has flown by! So for this challenge, Fall Colors, I chose to do the Marigold, The Darling Buds by Polkadoodles Designs.  Talk about a cutie! I love their images!

So for today, I chose to make a tag using my image. Here it is:

I used various layers of paper from The Paper Temptress. (Very good quality paper!). As you can see, they are all Fall Colors. I used 3D foam dots to "pop" my image on top of the orange paper. I added a yellow banner at the top and put gold rhinestone trim, and then added flowers. There are several different layers of twine for the top of the tag. A good friend of mine gave me some stickers that are very similar to "Dazzles", so I used gold as the trim around the layers. 

I hope that this has inspired you in some way, and that you will join in on the fun! Thank you so much for stopping by!

Blessings, Jeanie Ellis - Scrapbookingmamaw


Wednesday, September 12, 2018

Crafty Gals Corner Challenges #174 - 3+ Layers!

Hello, crafters! And welcome to my blog and another challenge with Crafty Gals Corner Challenges! What an exciting challenge this is! I love adding layers....the challenge is: 3+ Layers. Our amazing sponsors for this week are:

Digital Delights by Louby Loo
Prize: $5 Gift Certificate


Prize: 2 Digital Images


Bugaboo Stamps
Prize: $12 Gift Certificate

Now on to my project for this challenge! I love Conie Fong images! Always have! And this one is no exception: Alanna.
I had such fun with this one! And I knew exactly what colors I wanted to make her! I also wanted to make her into a Christmas Tag. One of this first things I did was to print out 3 images. I cut out one using my Silhouette, and the 2nd one I fussy-cut only the head (that almost sounded gruesome!). The 3rd image, I only fussy-cut the flowers. I colored the same colors on all pieces. I then used 3D to layer the head onto the head of the full image. I loved the effect this gives with the shadowing!

Then I cut out my tag, layered it with Christmas paper from my stash, then layered again with a smaller piece on top of that (centering it), and then another strip of paper to make my 3rd layer (3+ layers). I added her on top of the 3rd layer, added some glitter glue on her flowers and bodice, and then added rows of gold rhinestones on the top and bottom of the tag. 

For the tie at the top, I just used some really thin gold cord and slid some tiny "jingle bells" onto it.

Wow! What fun she was to do! 

I hope that you will join us in this challenge! And I always appreciate your stopping by! Thank you!

Blessings, Jeanie Ellis - Scrapbookingmamaw

Monday, July 2, 2018

Whisker Graphics Thinking of You Pocket Card!

Hello, everyone! This is Scrapbookingmamaw here to share with you a Pocket Tag I made as DT with Whisker Graphics!
I've done a step by step tutorial. Check it out here!

And thank you for stopping by!

Blessings, Jeanie Ellis - Scrapbookingmamaw

Saturday, March 17, 2018

Crafter's Castle First YouTube Hop!!


Crafter’s Castle FIRST YouTube Video Hop featuring Hot Off The Press products
from Paper Wishes! It starts today, Saturday March 17, and goes through
Friday March 23, giving you plenty of time to watch all 6 design team members
videos on YouTube. There are links below to all of the Crafter’s Castle design team
members videos.

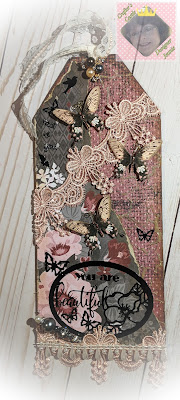
But first...here is my project for the YouTube Hop using Ruby Rose papers!


Tag


Close Up
Paper Wishes Website click HERE
Products:
I used Ruby Rose Papers click HERE
Fantastic Frames and Phrases Scrapbooking Dazzles click HERE

Now here are all the details on how to enter and what the prize is.

  • WATCH ALL 6 design team members entire Hop videos (links are below). 
  • Subscribe to ALL 6 design team members.....and be sure we can SEE that you have subscribed. 
  • Leave a comment....not just any comment....comment on something specific you saw in the video. Also, if you are a new subbie let me us know. And it would be fun to know where you’re from. 
And if you like what you saw PLEASE give a THUMBS up. Thank you!
Once you have done all of these things send an e-mail to 4crafterscastle@gmail.com with HOP ENTRY in the subject line.

The Grand Prize winner will receive 3 sets of Dazzles stickers!!! Also, listen close at each 

channel because there might be other giveaways!

Thank you for HOPPING along with us!


DT Line-Up

Janie https://youtu.be/1_ifrSqQSk0

Jeanie https://youtu.be/NOzju7e-X_s

Bev https://youtu.be/L-ZR8ivf53E

Tasha https://youtu.be/bw8qGCGS-NM

Erica https://youtu.be/nza8mpr5cDU

Priya https://youtu.be/opknneh2yZI

Please stop by Paper Wishes to see more beautiful papers and Dazzles as well as many other craft supplies https://www.paperwishes.com/
Blessings, Jeanie Ellis - Scrapbookingmamaw

Tuesday, November 21, 2017

ScrapbookingwithM.E. Boutique Mini-Album Swap!

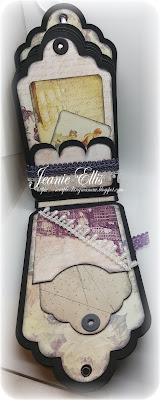
Hello, crafty world! I want to share with you today an album I made for a Swap in the ScrapbookingwithM.E. Members page Tag Mini-Album Swap! It was so much fun to do! While I won't go into the details of how I made it....I will say that I used the Silhouette Portrait to do most of the cutting, including the tags. I have put it in my Facebook Projects Page, Crafts by Jeanie. Please check out this page, as I have several items in there of different projects I have made.

Now here are glimpses of the album:


I also made some pins for my swappie, and a few other things.

Thank you so very much for stopping by! Be sure to check out the links above for more of my projects in the Crafts by Jeanie Facebook page! And like and follow too...it would be so much appreciated if you do!

Blessings, Jeanie Ellis - Scrapbookingmamaw


Thursday, August 3, 2017

Tags/Box Swap with ScrapbookingwithME Boutique

Hello, fellow crafty peeps! Today I want to share with you another project! I was recently in a Tags/Box swap with a Facebook group, ScrapbookingwithMe Boutique Members Page, where you had to make 8-4x2" tags and put them in a box. You could either make the box or alter one, as long as you put them into a box. My sister had recently given me a cigar box, so I used it to put the tags in, making sure it had plenty of room for some goodies. Here is my project...I hope you like it!

Outside of Box

Inside of Box showing 2 Tags

A Close Up of one of the Tags

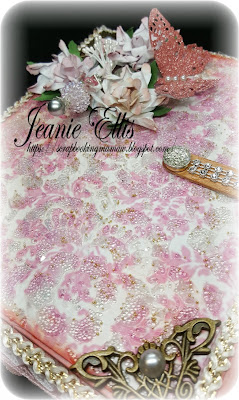
Close Up of Box Top

Top of Box
The Butterfly in Glittered Paper along with the Fastener are from ScrapbookingwithMe Boutique. The top of the box has Liquitex Glass Beads, which are also available in the boutique. Some of the laces are from the SBWM sister group, Lighthouse Stop n' Shop.  All the flowers, the stick pins, and butterflies are made by me. I had a wonderful time making this! 

I hope my Swap Partner likes what I did. It was delivered to her today! Yay! 

Thank you for stopping by! Be sure to check out those links, too! :)

Blessings, Jeanie Ellis - Scrapbookingmamaw
P.S. Because this is for a specific swap, if you would like to know where I got the papers, please private message me or use my Contact form (Email) and message me.


Wednesday, May 31, 2017

Crafty Gals Corner Challenge #125-Anything Goes!

Hello everyone! Today is the beginning of a new challenge over here at Crafty Gals Corner Challenges! We sure hope you can join us! And here are our amazing sponsors for this week's theme: Anything Goes! The sponsor(s) for this challenge are:

Prize: $20 gift Certificate


SheepSki Designs

Prize: 3 Digital Images
I want to share with you now my project for this week. As I have mentioned before, I LOVE making tags. I have collected many through swaps, but I sure have a lot I've made still in my Iris Container! I keep them for just the right person at the right time. Now here is my new tag, using Kasmin from SheepSki Designs:

I have to tell you....I love Andrea's digitals! And this one is no exception! 

My Process:
I first colored my digital using my markers. Then I cut out a tag shape from my Tim Holtz collection, Paper Stash. I got that through ScrapbookingwithM.E.  Boutique. I then got my Tim Holtz Brick stencil and spread Liquitex Glass Beads (also from the Boutique) over various areas of the tag. Once I let that dry, I got out my TH Rusty Hinge Distress Ink and "smooshed" (for lack of a better word) onto my mat, squirted some water on that, and brushed it over the brick areas on my tag. I love the result! I dried the ink with my heat gun and then layered laces and pearl drop strands on top. At the bottom I added more laces, and a large flower with pearl sprays. At the top you see a hummingbird I bought through through Reneabouquets

I was totally excited about how much the colors all matched so well with each other! Oh, before I forget, I also stained the tie at the top with the same distress ink on the brick. I heat dried it so it would be permanent. 

I hope you give a go at making something for this week's challenge! And thanks for stopping by!

Blessings, Jeanie Ellis - Scrapbookingmamaw 


Tuesday, May 16, 2017

Through the Craft Room Challenge May 16th

Hi, fellow crafters! We've started another Challenge over at Through the Craft Room Door! Our sponsor for this week is Crafty Sentiments

Prize: 3 Digital Images

A Little Bit About Our Sponsor:
Crafty Sentiments Designs started back in 2009 by myself Suzette the owner, Me and my artist brings you cute whimsical and fun characters, to create unique and exciting handmade gifts and projects. We also carry our own brand of exclusive Rubber stamps, Digital stamps, Sentiments and cutting dies, CD Roms that is perfect for all your scrapbooking and card making needs, there is always something new each month as we release new images each month. Crafty Sentiments Designs is now having live shows on Hochanda.TV a UK base craft channel. Visit the website at www.craftysentimentsdesigns.co.uk for lots of products.


Be sure to check out their site! Now on to my Tag Money Card using the Blitz with Present image.

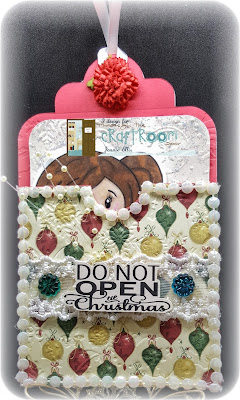
Outside of Tag Pocket (see her peeking out?)

Tag Pocket and Card

Close Up
I thought I'd better get a start on my Christmas cards, as each year I try to hurry and get them done...and end up forgetting someone! Not good! I had a lot of fun with doing a different kind of tag! But to find out my supplies used, check out our upcoming TTCRD magazine!

Thanks for stopping by! I hope you will join us this week!

Blessings, Jeanie Ellis - Scrapbookingmamaw


Wednesday, April 19, 2017

Crafty Gals Corner Challenge #119 - Embellish It!

Hello, crafty peeps! We've started another week of challenges over at Crafty Gals Corner! I sure hope you join us. Our wonderful sponsors this week are::

Prize: $15 Gift Certificate


Prize: 2 Digital Images

So this week, I used an adorable image: A Gift - Winnie Fruit Punch by Polkadoodles. Adorable!!

Because of her name having "Fruit Punch" in it, I kinda thought of a strawberry flavor. With that in mind, I went with variations of pink for the fruit. I cut out my tag and image with my Silhouette, and colored her with my Prismacolors. I have some new markers, but there are still some things I'd just rather color with my pencils. I embellished the tag with laces, a butterfly, some roses, pearls, pearl spray, and flowers. 

I normally do a little stenciling on  my tags, but didn't want to cover up the lovely paper I had discovered in my paper stash. So I chose just to embellish it.

I hope you drop into Crafty Gals and enter into the challenges. Every week there are so many amazing projects to choose from, but so very hard to pick the Top 3! 

Thank you for stopping in my blog! I really appreciate it!

Blessings, Jeanie Ellis - Scrapbookingmamaw


Saturday, April 15, 2017

Sweet Escapes Tag

Hi once again, crafters! I discovered another digital company a short time ago. And I have to tell you...I love them! The company is Sweet Escapes. Believe me, when I went in to shop, it was hard to choose which image I would try first! But in the end, I chose the image called Kate.  (Just a side note here: I am not a Design Team Member with Sweet Escapes. This is just something I totally love and want to share.)

For her, I decided to make a tag. Here she is:

I printed off the digital paper and cut her out with my Silhouette. I used my Prismacolors to color her in. I decided to leave her hair black and white (although I did use my Prismacolors for the black and white colors anyway, to give it more depth). The butterfly you see is from Reneabouquets. I decorated my tag with lace, pearl trims, and a flower. 

I hope you enjoyed her! And thank you so much for stopping by!

Blessings, Jeanie Ellis - Scrapbookingmamaw

Saturday, March 25, 2017

Spring 2017 Coffee Lover's Blog Hop Share #2!


So, I made another project for the Spring Coffee Lovers Bloghop! And my husband wants it! (Really? Awesome!) So, he's going to hang it on the wall by his computer. 

I decided on this round to make a tag to hang like a little wall plaque. I normally use my Prismacolors to color in my projects, but I bought some markers to see how I liked using them. No, not Copic or any of the other name brands, as I wanted to experiment on markers first without spending a lot of money. After all, Prismacolors have been my go to for a long time, and I hesitated going into another medium.


If you go to JessicaLynnOriginal, you'll find some awesome stamps, even a free one! So you can join in too!

Now here is the tag:
I must say, for being cheap markers, they were very well worth it! I hope you join in on the hop too! I never imagined there were so many wonderful coffee digitals out there! So fun!

Thanks for stopping by!
Blessings, Jeanie Ellis - Scrapbookingmamaw


Saturday, March 18, 2017

JessicaLynnOriginal Reveal Card #3

Hello, fellow stampers! Today is my 3rd and final Reveal for the Jessica Lynn Original Mason Jar set! And of the 3 that I made, this one is my favorite! I love doing tags...I'm sure I've mentioned that somewhere before...lol...and I love pink! Here's a picture of what's in the set: 
And here is my project:

Close Up of Tag
As you can see, I have sort of a Mixed Media thing going on here. I used my Silhouette to cut out the bottom and top layers of the tag. Then I used my Gelatos to color up the top layer, and then used a stencil to spread texture paste all over it. Before it had a chance to dry, I added glass glitter all over the top, pressed it in slightly (be careful! it's sharp), and then used my heat gun to dry it. I loved the effect of the glass glitter. I also used Glossy Accents on the buttons and the little garden home to give it some shine. The butterfly applique is from KPKre8tions and the pink background paper with the pink ribbon are from Paper Temptress
This adorable set of stamps can be shipped FREE if pre-ordered with the also NEW Hawaiian Vacation Brentwood SetBut hurry! Free shipping ends tonight! I adore this set of stamps. They are very well made, and the sizes of some of them are so cute! However, if you only want the Hawaiian set, it will be shipped free when pre-ordered, by itself. 

To learn more about the Hawaiian stamp set, follow this link to a video that Jessica has made:


While you're there, tell them that Jeanie sent you! And don't forget to check out my teammies blogs! They have some wonderful projects to share with you! Here they are:

Blessings, Jeanie Ellis - Scrapbookingmamaw

Wednesday, March 15, 2017

Tsunami Rose Designs Mixed Media Tags

Hello, fellow crafters! It's time once again to share with you another DT project I did for Tsunami Rose Designs! This time I make a Mixed Media Tag. TRD has such beautiful digital papers! I'm amazed by the quality of these designs! For this tag set, I used the Rose Noteworthy Digital Printables. Here are photos of my project:
Large Tag with Pocket Insert & Tags with Envelopes

Tag showing Pocket
Tags with Decorated Envelopes

Tags - Die Cuts are on 3D Foam Squares

Back of Tag

Supplies: Chipboard (4x6"), Digital Design Papers, Digital Die Cuts, Stencil, Texture Paste, Lace, Pearl Drop Trim, Tags, White Litty Bitty Bags, and Twine (Whisker Graphics).

I started off by cutting down a black chipboard to 4"x6", then layered it with one of the digital journal prints (#15 in the kit), from TRD. I then took page 3 of the add-ons and fussy cut out one of the roses to make a large "die cut". Once I adhered those 2 layers on, I took my Rose stencil (Prima) and spread my texture paste on it. I set that aside, and began creating my tags I got from Whisker Graphics. I took one of the add-ons (#13) and adhered the paper to the tags, adding a die cut with 3D Foam Squares on each one. My die cuts were all cut from the Ephemera Kit 14 page 13. I then used my hole punch and added twine (Whisker Graphics) through the holes. 

I decorated the 2 Litty Bitty Bags with a musical note on one and a sentiment on the other, also adding die cuts from the same Ephemera Kit. Once I was done with those and knew the stenciling was dried, I added the lace, pearl trim, and a pocket with a die cut onto the front of the card. You'll also see that I decorated the back, as I didn't want to leave it bare. 

I hope you enjoy this and visit Tsunami Rose Designs Etsy Store! Here are some other great links to follow TRD!

TRD Etsy shop: http://bit.ly/tsunamirose
TRD FB Fan Page: http://bit.ly/trdfbfanpage
TRD FB Group: http://bit.ly/trdfbgroup
Thank you so much for stopping by! I hope you visit!
Blessings, Jeanie Ellis - Scrapbookingmamaw