Showing posts with label Crafty City. Show all posts

Wednesday, July 31, 2019

Papercraft Business Challenge - Theme is CIRCLES!

Hello everyone! And welcome to another monthly challenge over at Papercraft Business Challenge Blog!   I love making shaker cards, and this one is no exception! And wow! Take a look at this awesome prize!
August Challenge Prize: Whimsy Stamps - Wee Florist


So let me share with you now what I made for the Use a Circle Challenge:


I used a thin cuts die and foam to make my Shaker as the circle for my card. I cut out a banner for the side of the card and placed my circle on the card base. Inside the shaker I added sequins, then placed rhinestones around that. The sentiment was easy, as it was part of the paper pack that I got from Crafty City.  Take a look there....there's a lot of beautiful paper there! I also added some tiny mirrors I had in my stash for more "bling". 

There you have it! I hope that you will join us for this month's challenge!

Blessings, Jeanie Ellis - Scrapbookingmamaw


READY TO GET THOSE PAPERCRAFT CHALLENGES ORGANIZED?

If you love to enter your projects into online 
papercraft challenges or just starting out – 
this Papercraft Challenge Planner is for you!

Wednesday, May 1, 2019

Papercraft Business May Challenge - Mother's Day

Hello, crafters! It's time for another challenge over at the Papercraft Business Challenge Blog!  THEME: Mother's Day. Here is the prize for this month by Milton & Co. - Millie Baking. Isn't it adorable??

What a fun card to do! I used papers I got from Crafty City. I also added a Silhouette using my Cameo 3. 
I hope you will join us! 

Thank you for stopping by!
Blessings, Jeanie Ellis - Scrapbookingmamaw

Thursday, January 31, 2019

Papercraft Business Challenge - February 1st

Hey, crafty peeps! It's time for our monthly challenge over at Papercraft Business Challenge Blog!   I can't believe it's already challenge #15! Wow! Time sure does fly, doesn't it?? Before we go on to what I created, take a look at our prize for this month's winner! 


Isn't this perfect for the February winner? Now here is my card: I used some paper and a lace circle chipboard frame from Crafty City, and a laser cut blue heart and butterfly from Reneabouquets.  I also used Pixie Dust Embossing Powder from Blue Fern Studios. I LOVE that powder! Below I have shown a closeup of the embossing. 


I hope you will join us! Thanks for stopping by!
Blessings, Jeanie Ellis - Scrapbookingmamaw

Sunday, December 2, 2018

Papercraft Business Challenge #13!

Hello, everyone! Today I want to share with you our newest challenge, #13, December 2018, for Papercraft Business Challenge Blog!  Let me tell you, the other Design Team Members have outdone themselves too, so be sure to check out all of their projects!

Our prize for the winner for December is the awesome Magnolia Peaceful Tilda Stamp:

She is  a real sweet stamp! Maybe you'll be the one to win it? ;) Now here are the cards I made, using a paper pack from Stamperia that I got from Crafty City called Christmas Vintage:
I love the vintage look of these papers, and they make super Christmas cards, too! I hope that these have inspired you to join us in on the fun over at Papercraft Business Challenge Blog! Thanks for stopping by!

Blessings, Jeanie Ellis - Scrapbookingmamaw


Tuesday, July 31, 2018

Papercraft Business Challenge #9 - August! Optional-Summer

Hello, crafters! Today begins a new challenge over at the Papercraft Business Challenge Blog - #9! This time it's Anything Goes with an optional SUMMER theme. And we have a new prize for the winner of the August challenge! Here it is:
Jillibean Soup - Sunshine Stamp

What a great stamp set that is! You'll want to try for this one! ;) Now for my project:

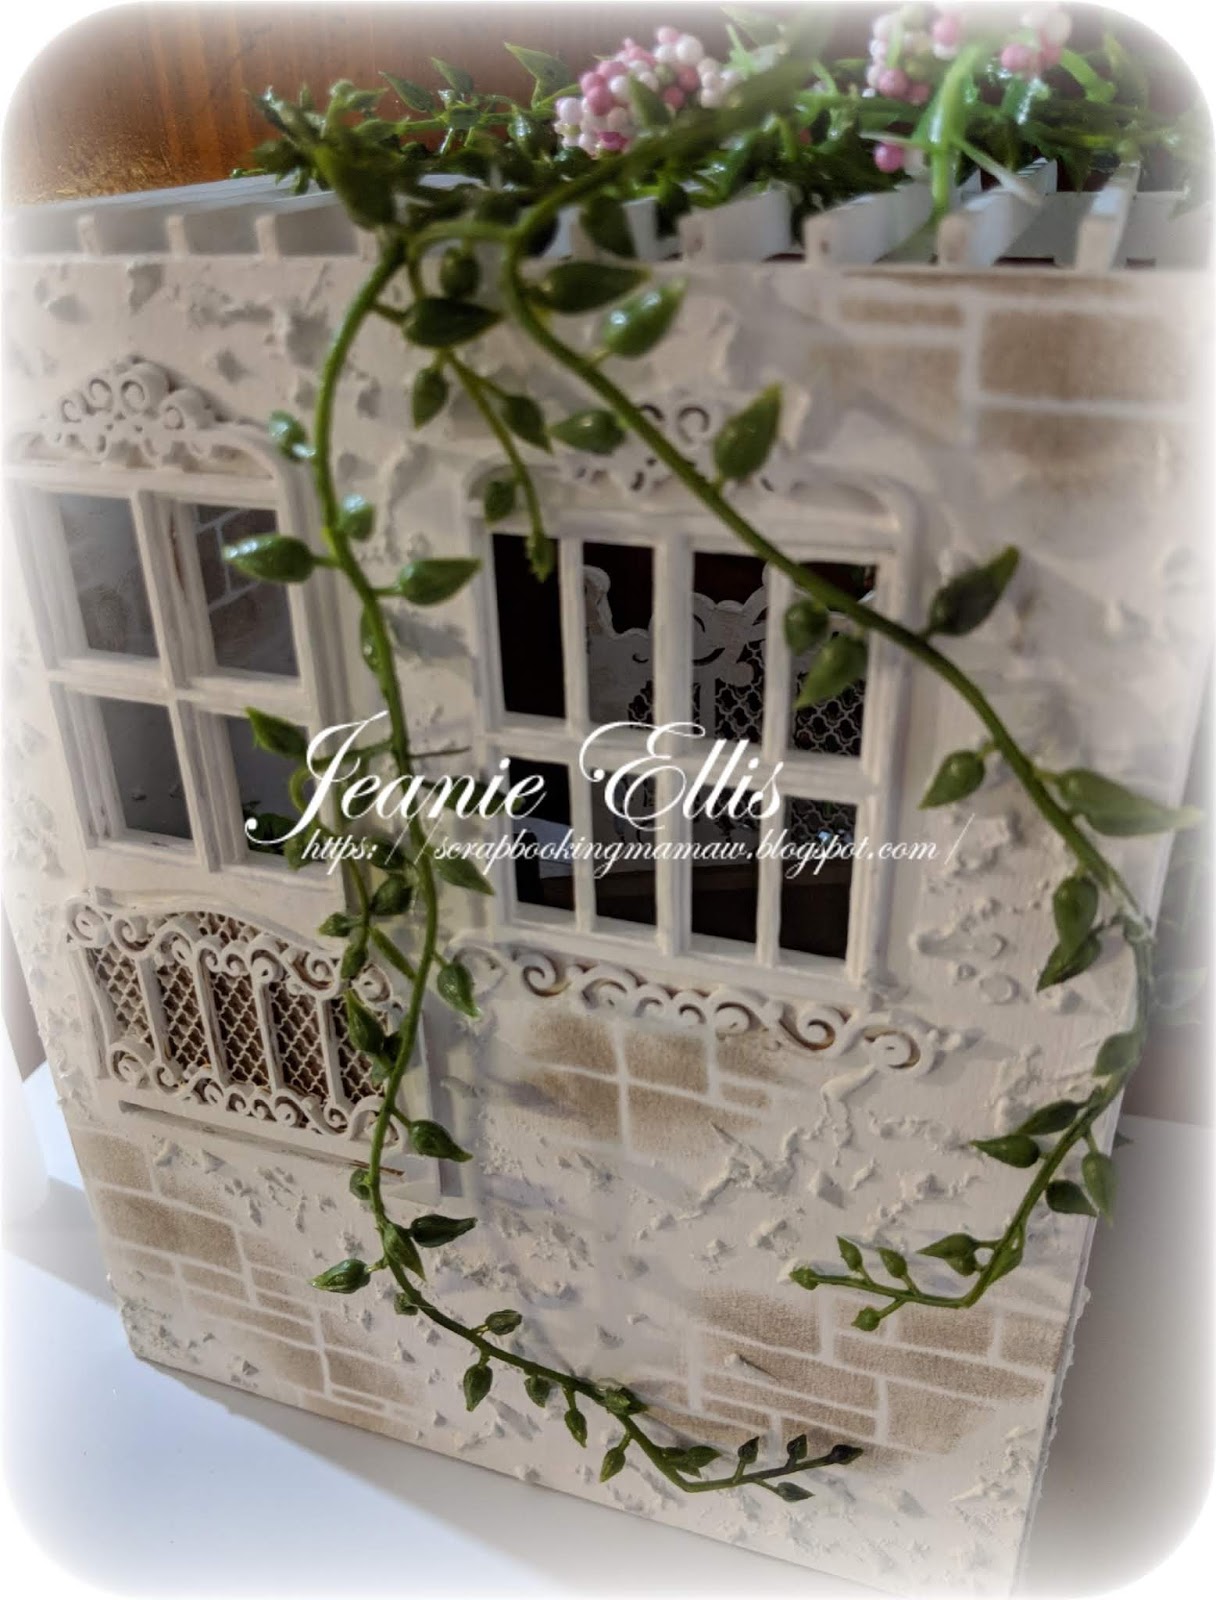
I got this amazing kit from a website store, Crafty City, the Balkon Royal:
To me, sitting on a balcony just screams summer! So I thought I'd take this awesome kit and see what I could do with it! So here it is:
FRONT

ANGLED VIEW

BACK

GARDEN CLOSE-UP
COLLAGE

Wow! What a project it turned out to be! Not because it was hard, but because it took more time to decorate it than I thought. But once I got started with it, there was no stopping me! I really had to "control" myself so as to not overcrowd it. *wink*

For the outside of the balcony, I wanted to create something that looked like it was starting to loose it's "stucco" coating, revealing what used to be a brick siding. Although it was already white, I further whitened it by painting white acrylic paint on it. I then made some homemade paste and "spackled" it onto the siding, AFTER I had used a stencil to put on the brick part of the balcony. I did the same thing on the inside. 

And then I thought I'd go to my fave craft store, and buy some "garden fairy" elements, such as the bird on the bird bath, the bird bath, and the pot of greenery. The bench on the balcony is actually from a miniature doll house furniture accessory. I found some flowers on sale at the store, and used that with it's ivy to wrap around the balcony. I put in some moss in the garden areas and set in the bird bath with a stone sign on the ground that says "Welcome". The fence is from the craft section of the store.

The flooring of the balcony has scrapbook paper on it and the steps that look like wood planks so I used that to make it look like more realistic.

I hope you enjoyed my little process! Thank you for stopping by! Be sure to join in on the fun!

Blessings, Jeanie Ellis - Scrapbookingmamaw


Wednesday, April 25, 2018

Crafty Gals Corner Challenge #164 - Anything Goes!


Hello everyone! It's time for another challenge over at Crafty Gals Corner Challenges! This one is #164 - Anything Goes! This week we have 3 amazing sponsors! They are:


Polkadoodles
Prize ~ $15 Gift Certificate


Lemon Shortbread
Prize ~ 3 Digital images


OddBall Art
Prize ~ 3 Digital images

How awesome is that??!! Three sponsors for this week! So now I want to share with you my project for this bi-weekly challenge! My image is from Lemon Shortbread Digital Stamps called Butterfly Girl. And I absolutely love her! Since this is an Anything Goes challenge, I decided this time around I'd make a tag. I love making tags, and my supply of them are proof! Haha! So here she is:
                                          
Without going into a lot of detail, I simply cut her out and colored her in with my Prismacolors. I used my Silhouette to cut the open design tag out and covered the back of it. I also added lace, and colored a Scrapiniec Chipboard I got from Crafty City. I then added all my embellishments and my sentiment, along with some lace and pearls.

I sure hope that you come join us in this challenge! Lots of prizes to go around! And thank you so much for stopping by!

Blessings, Jeanie Ellis - Scrapbookingmamaw


Friday, February 23, 2018

Let's Celebrate! Shabby Chic Card

Hello, crafters! So today I want to share with you a new card using Maja Designs Papers, Let's Celebrate! I bought these from Archana Joshi of CraftyCity.com. It's a type of fold I've never tried before. Without going into further details for a good reason (you'll understand later *wink*), here is my card:
Front with Tag Insert

Inside of Card, Spread Out

Slightly Unfolded

Tag Exposed
I had a lot of fun making this card! And those papers are SPECTACULAR! Thank you so much for stopping by!

Blessings, Jeanie Ellis - Scrapbookingmamaw

Saturday, November 11, 2017

Shabby Chic Christmas Card

Hello, everyone! I wanted to drop in today and share a Christmas card with you. I love Shabby Chic, so when I saw a challenge posted in a Facebook group, I decided I'd go for it. But I wanted this one to be a Christmas card, as I just bought this gorgeous paper and die cut from an online store called Crafty City. I love this new designer cardstock made by Prima. This one is the Sweet Christmas paper pad. Here is my card:
I wish the glitter on the poinsettia would show up better, because it sure is pretty! First, I made the poinsettia following the YouTube channel of Archana Joshi, tutorial LINK HERE. I then took some white as a base for the card, making it an A2 card. I cut out some paper from the pad, and distress the edges of it, then mounted it onto the white. I then cut out the girl image and mounted her on top of the 2nd layer. I used my Big Shot to cut out the blue and pink branches you see up there (also from Crafty City.  I added snowflakes, pearls, a pearl trim, and a pink rose trim to the card. Lastly, I added a white rose to the bottom right of the card (what's Shabby Chic without at least one rose, right??). The rose was also from Crafty City.

I entered this card into the Facebook Page Play Creative. You do have to join the group to participate. I have also entered it into The Merry Christmas Challenge Blog, #42, Anything Goes + Christmas - Twist: Add Snow. I have snowflakes. 

Thank you so much for stopping by! 

Blessings, Jeanie Ellis - Scrapbookingmamaw